Summary
Creating Reusable Forms
In this lesson we will look at how to reuse your WPF forms in pyRevit across all your scripts. This is the ultimate goal for creating custom UI forms. This will save you tons of time as you integrate these forms across all your scripts, similar to how we used pyrevit.forms until now.
It's also going to be a very easy lesson. We've already created an Alert form, so let's make it reusable by leveraging pyRevit library.
Lib Folder structure
Let me quickly recap how to reuse code in pyRevit.
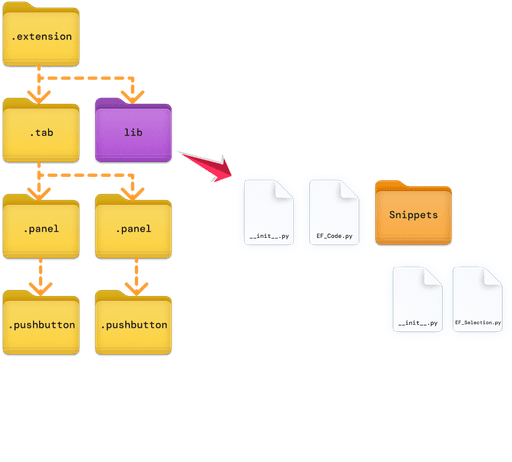
In general, everything is about creating a library folder and then placing your reusable code there like inside of a custom package. Then you will be able to import it in all your scripts because pyRevit looks for lib folder by default.
Also, there are a few things to keep in mind:
Place
libinside.extensionfolderCreate
__init__.pyfiles inside every folder inlib
(This will make python read these files as a package…)Write reusable code
P.S.
If you don't know how to use pyRevit lib, you can also check this video from LearnRevitAPI course where I will explain the basics.
Here is the folder structure to remind you:
Setting Up the Folder Structure
Now, let's create the lib folder inside your extension.
Create
libfolderAdd
__init__.pyfilesCreate folder for your UI forms (e.g.
ef_forms)Copy your Python and XAML script from previous lesson.
I will also rename my files toAlert.pyandAlert.xaml
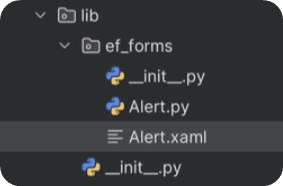
Once you copy, you can also clean up your python file a little. You won't need pyRevit metatags like __title__, __doc__…
You can also get rid of your comments, and you won't need the main code on the button where you used the class.
💡Tip: Write a doc string to describe your class and how to use it. You can also put your example code from the bottom inside as an example.
Here is my cleaned up code from Alert.py
The XAML code hasn't changed, but I will leave it anyway to avoid any confusion.
Importing Reusable Forms
Once you have placed files inside of your lib folder, you can import them anywhere in your code easily.
I will create a new pushbutton and then write the following code:
You can see side by side that we literally importing the class a python file located in a nested folder in the lib.
pyCharm lib Autocomplete
Also it's great idea to setup your Autocomplete for your own lib folder. There are 2 ways to do that.
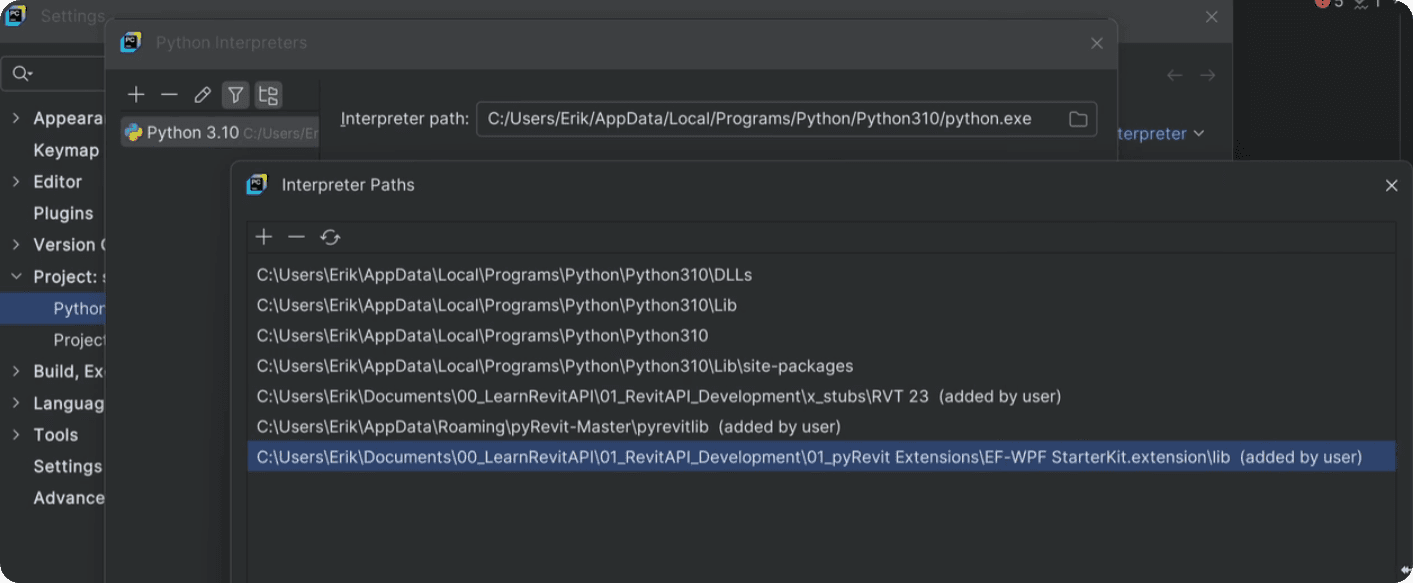
Add path in Interpreter Settings
Just follow the steps that we did for Revit API Stubs so your IDE can reference the files in your lib folder.
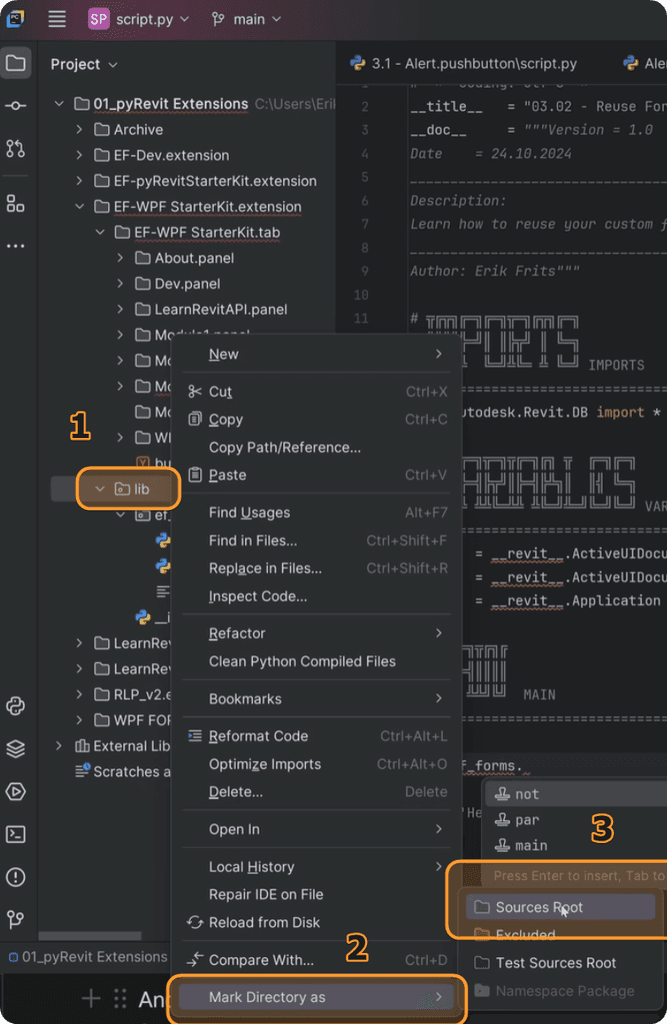
Mark lib folder as the Source Root
There is also a feature in pyCharm that can mark folders as Source Root. That might not be the real use-case, but it works for autocomplete of packages like this.
💡 Sometimes autocomplete doesn't work right away. It worked half way during the video, but the next day it started to work as it should. I guess it's a bug or something, keep it in mind.
Simplifying Imports
While we are on this topic, let me also show you how you can use __init__ files inside your lib folder to simplify your imports.
It's obvious that using the current method you will have to import all classes and methods always from a new file, and it might be annoying and not as user-friendly.
It would look something like that:
Instead, we can import all classes directly from ef_forms folder by writing
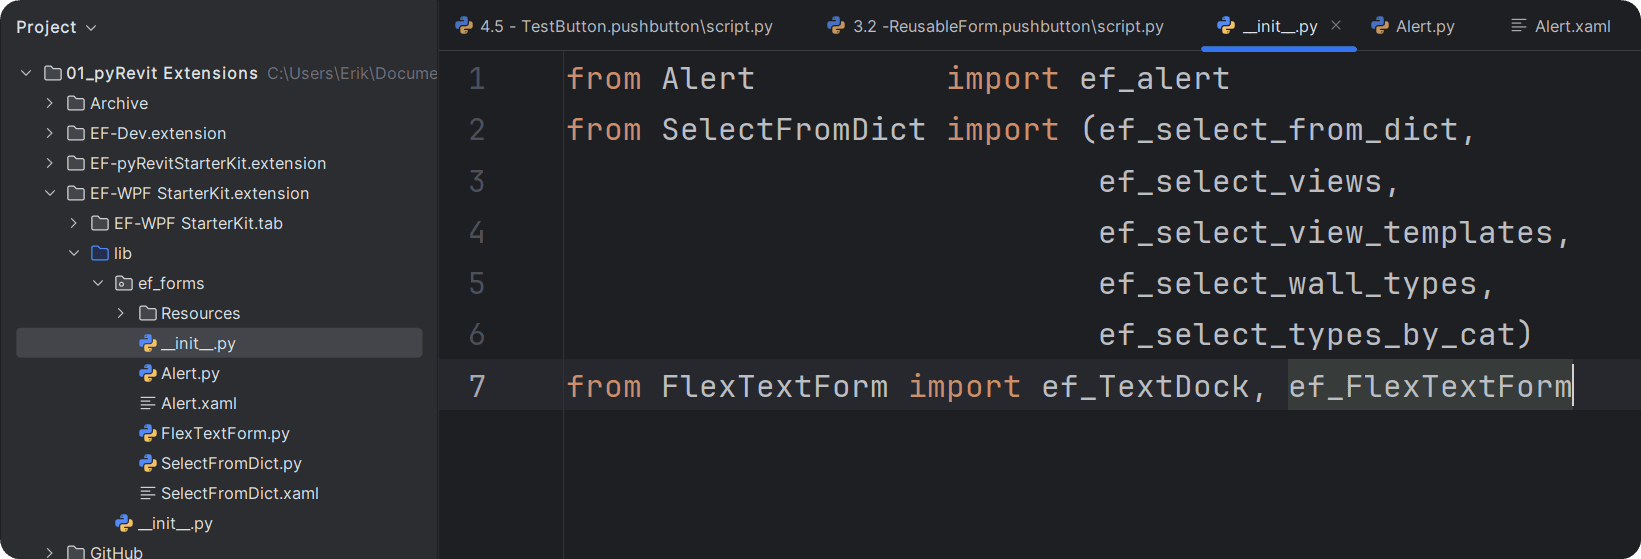
However, to do that we need to use __init__ file placed inside the ef_forms folder.
I won't go in much details, but this file will represent the ef_forms module itself. So, you can go inside the __init__ file and import all your classes one by one from individual files. And then, later you will be able to re-import them in your script directly from ef_forms.
I'm going a bit of ahead of myself, but that's how it would look like in the future, so you get an idea. And by importing all these forms inside of __init__ file we will be able to import them directly from ef_forms
I thought that you might want to know this trick about package management in python.
Homework
Now it's your turn to practice. Go and make your form reusable and don't forget to test it across multiple scripts. This is not complicated and it will save you a lot of time in the future once you get comfortable with it.
Happy Coding!
