Summary
Debugging Your XAML Code
I know you can't wait to jump into writing XAML code and start creating your WPF forms for pyRevit already. But before we do that, let's talk about debugging your XAML code.
🪲 You will encounter errors! And that's okay.
In general, it's not hard to avoid them because whenever you write anything with your XAML, you can see changes instantly in the UI preview window. However, you still have to click on the canvas to update preview.
And when you get an error, you can simply use CTRL+Z to go back before it's broken and try it again.
So, let me show you a few error messages that you might encounter and how to debug them on your own.
Error #1
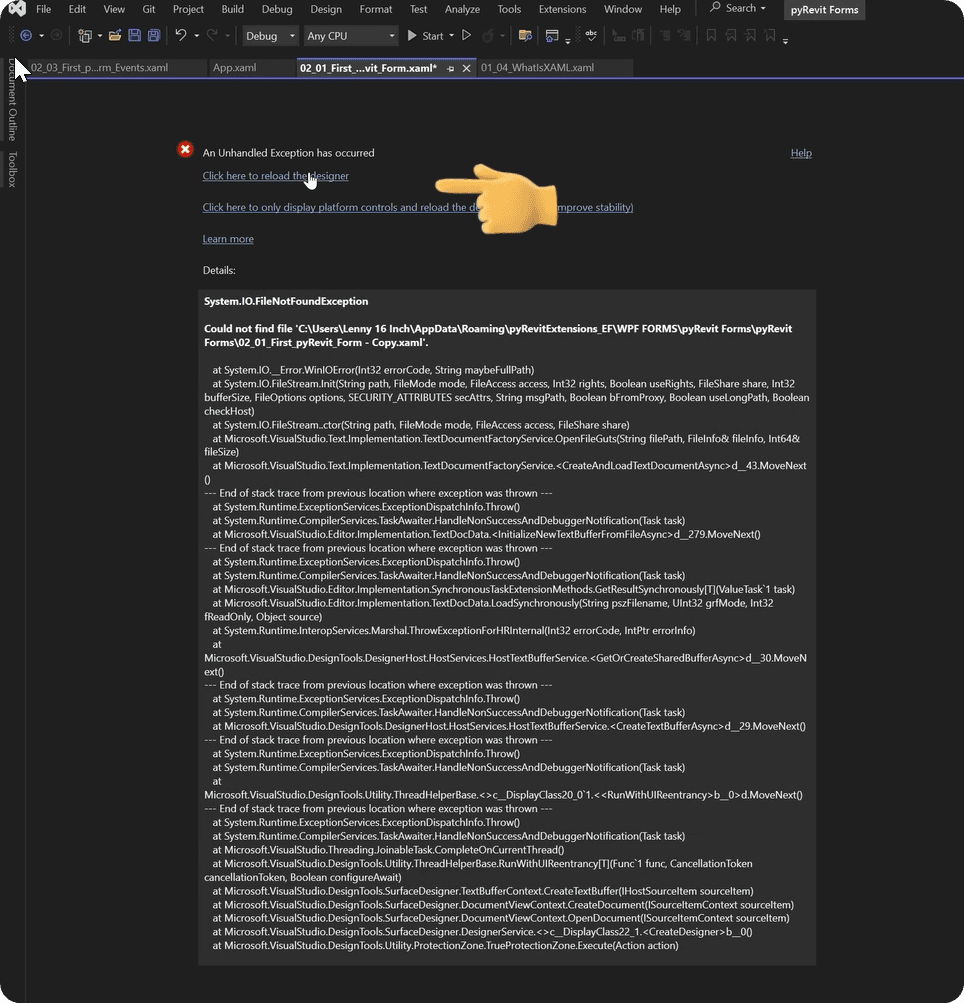
Let's start by renaming our XAML file in Visual Studio. And when you do that you might encounter your first error.
Normally you form would disappear and you can reopen the file and it might be fine. But sometimes you might see this error message.
Don't worry, there is a 'Click Here' button to reload it and usually that helps to solve it. Otherwise you might need to restart Visual Studio.
Missing Closing Tags
Let's manually create a few errors starting with removing a Closing Tag '>'.
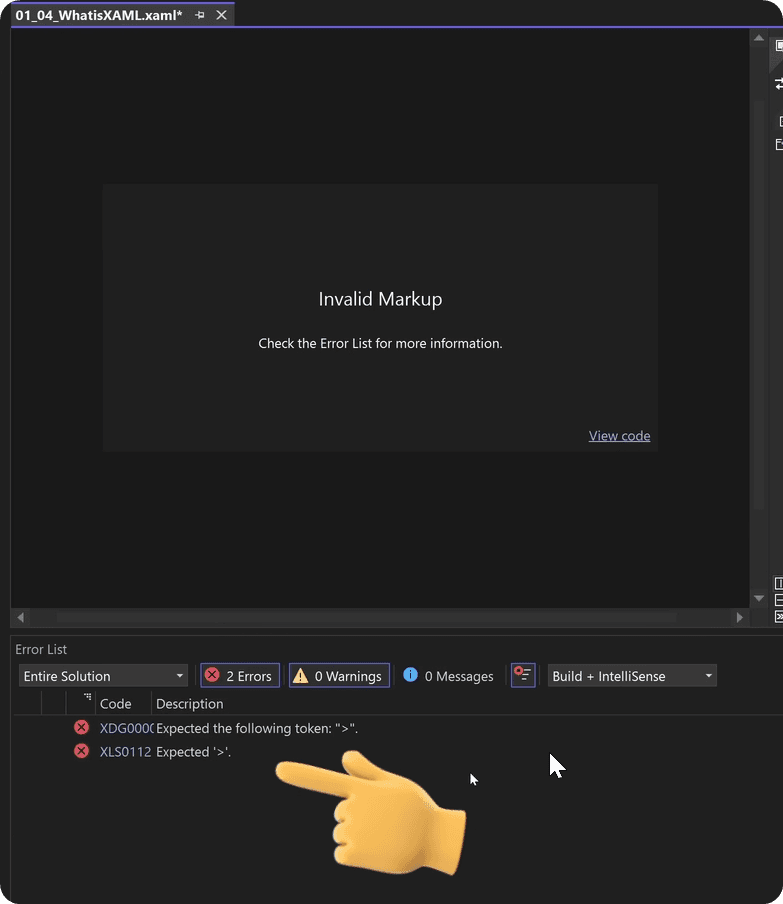
Once you do that, nothing will happen, until, you click on the preview window and it forces it to update, and that's when you will see the error message.
When you get an error in XAML code, you will notice Invalid Markup message.
You have a few options, you could click on View Code button on bottom right, and it will move your cursor to the line where error has happened, or you could look in Error List below.
In this case, it will tell you:
"Expected the following token '>' ".
That one is easy to solve, let's bring it back and look further.
Incorrect UI Control
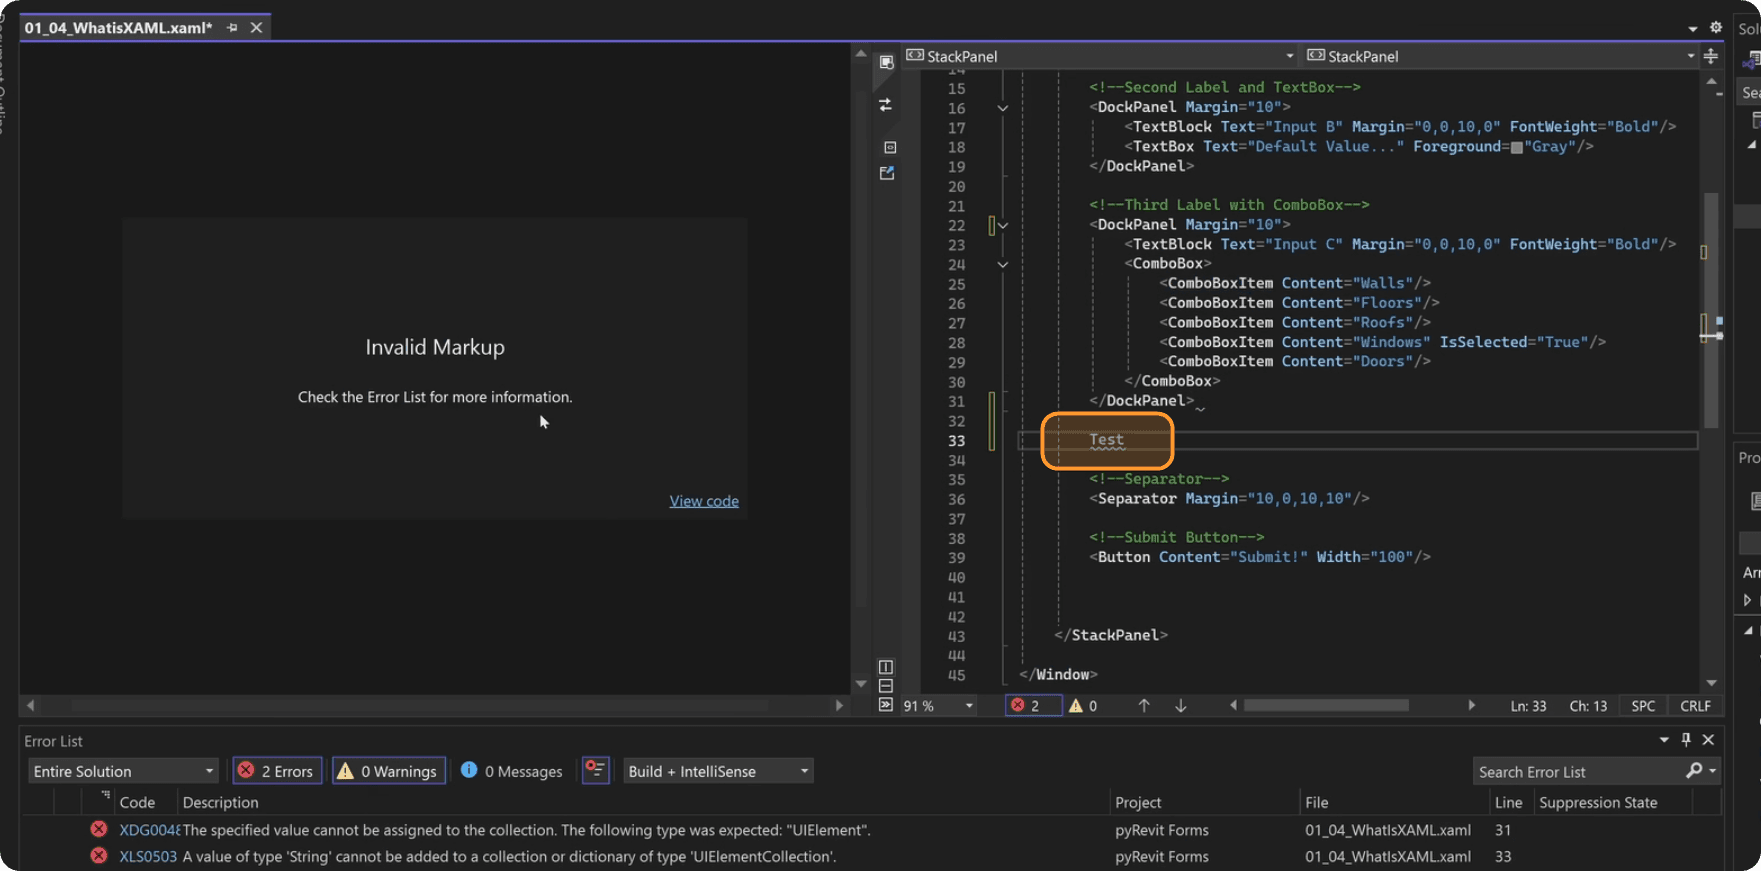
Next let's try to add a random text in between elements. This will obviously give us Invalid markup and in the error message it says that is not a valid UIElement.
So clearly, it expects to see WPF classes with the right formatting (I mean arrow brackets <>).
Unclosed Elements
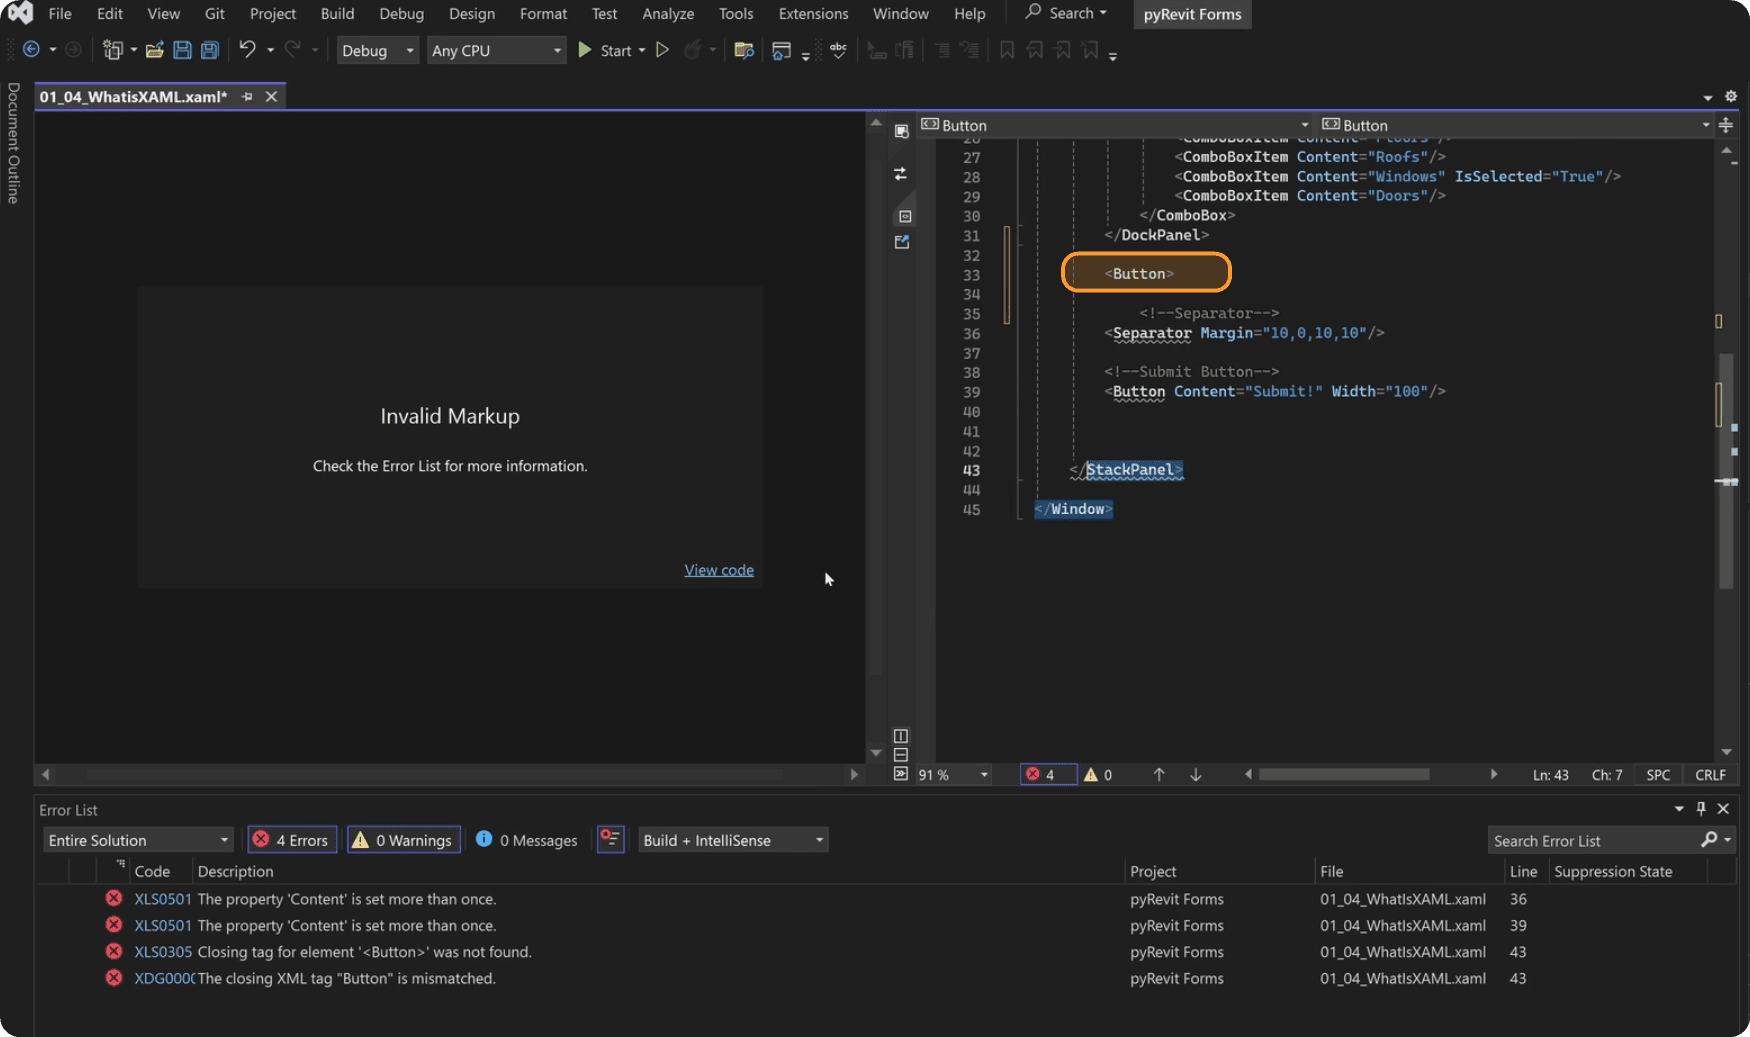
Next, let's create a start tag for button but not add any close tag for this element.
In this case we will get multiple errors because it messes up with the syntax, but you will clearly see a message 'Closing Tag for element <Button> was not found.
So it's also easy to understand what's going on and how to solve it. Just read through all messages, because often times a single error can cause many different messages.
Misspelled Properties
Now let's look at the properties.
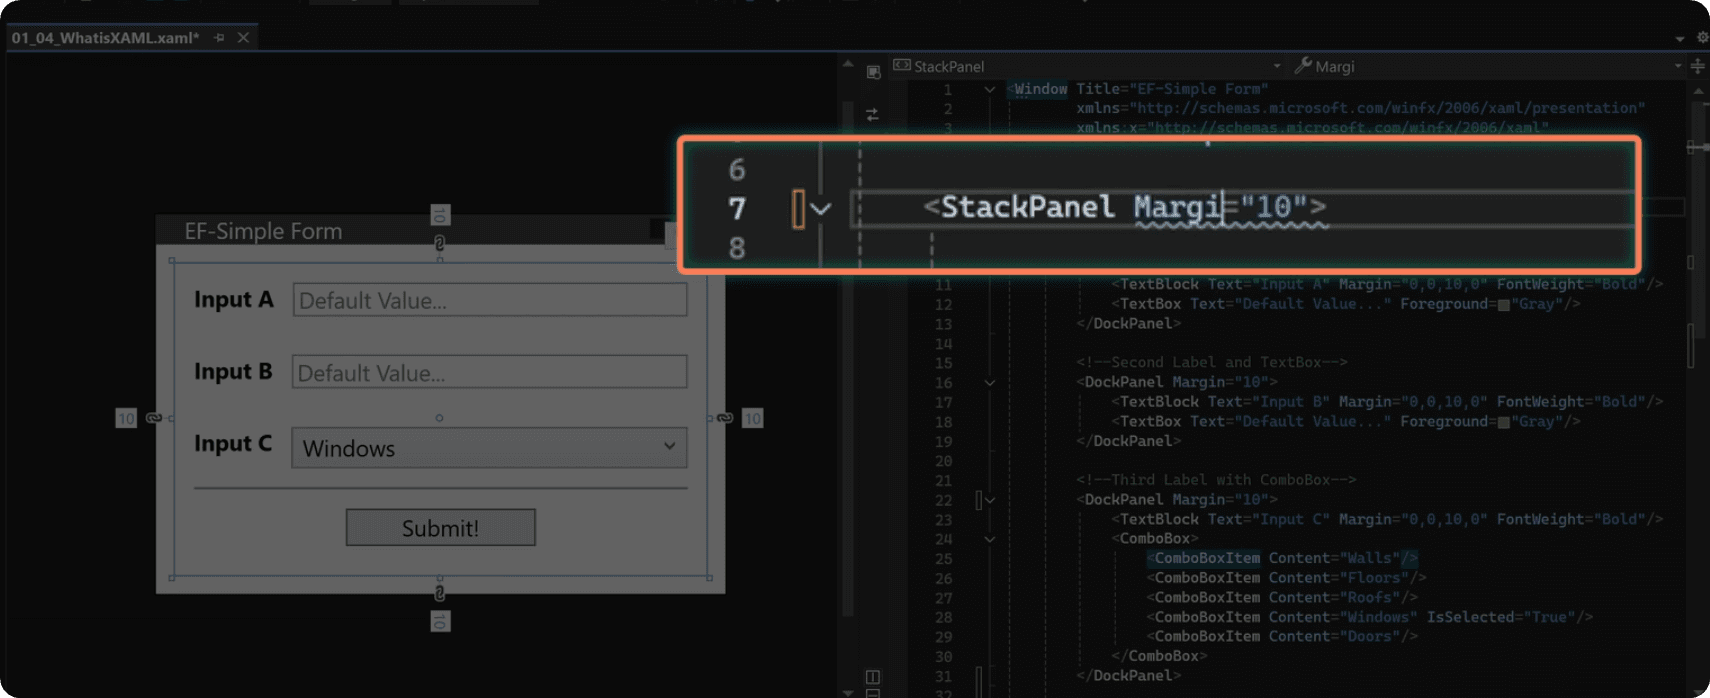
Let's say that we were in a hurry and misspelled Margin as Margi.
This one is easy, you will clearly see the error message that property is not recognized or is not accessible.
Invalid Property Values
Now let's see what happens when we provide the wrong type for the value a property.
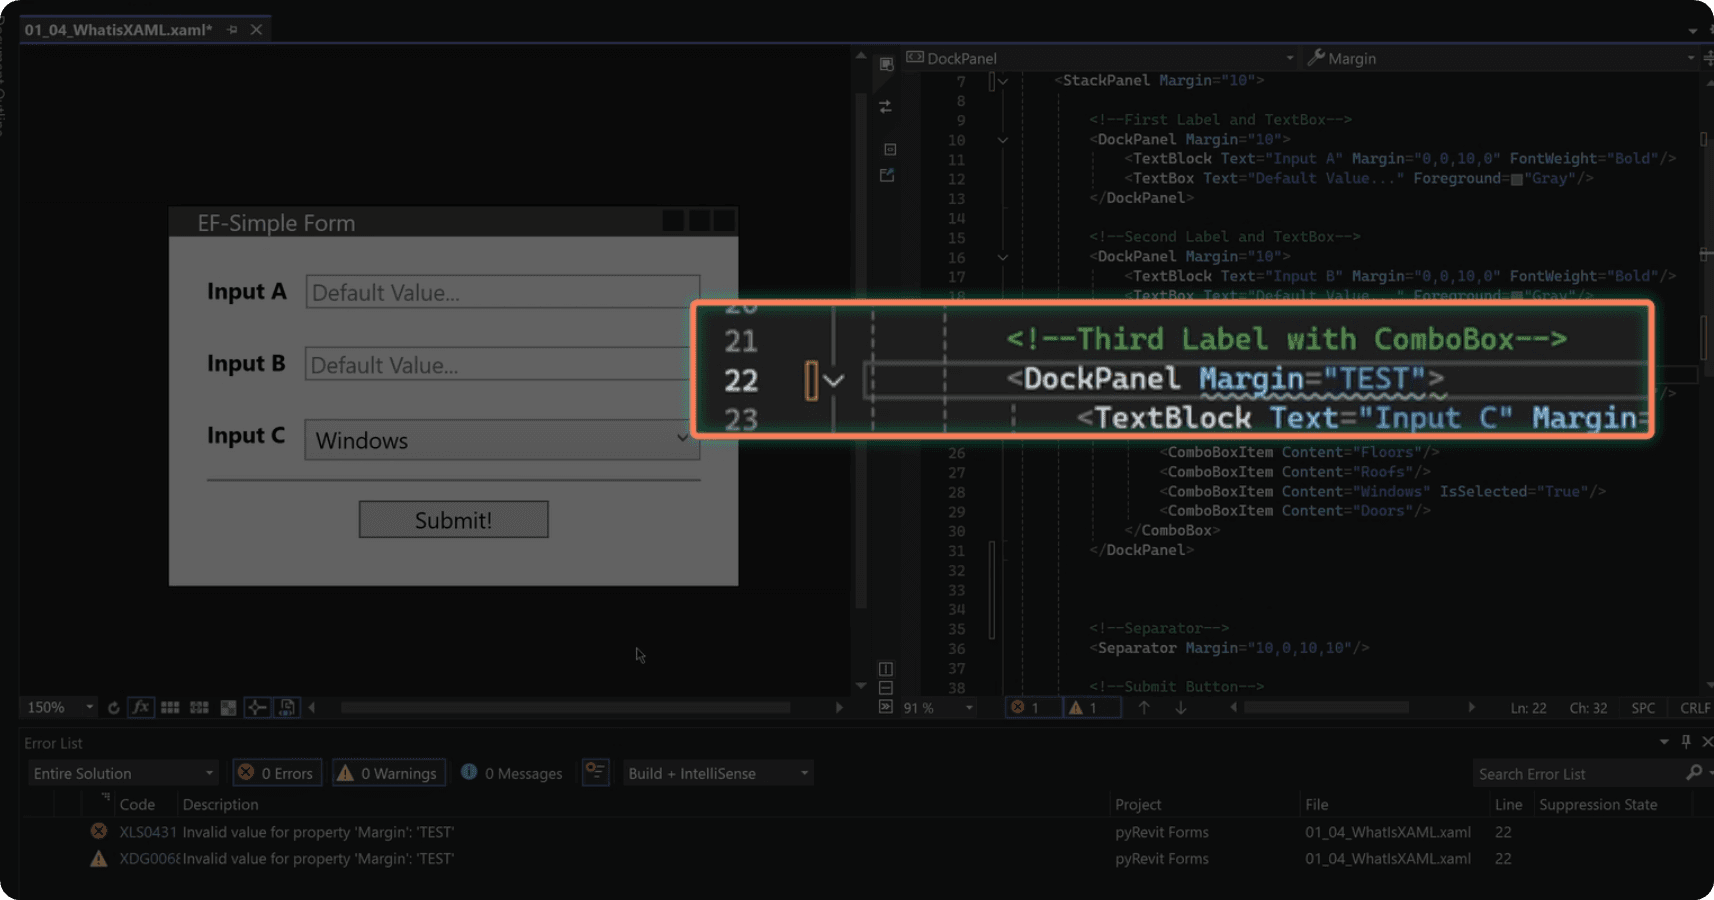
Let's set Margin="Test"
And in this case you will see an error message, but surprisingly it won't crash your form. So this kind of error might easily go under the radar if you are not paying attention.
Incorrect Element Names
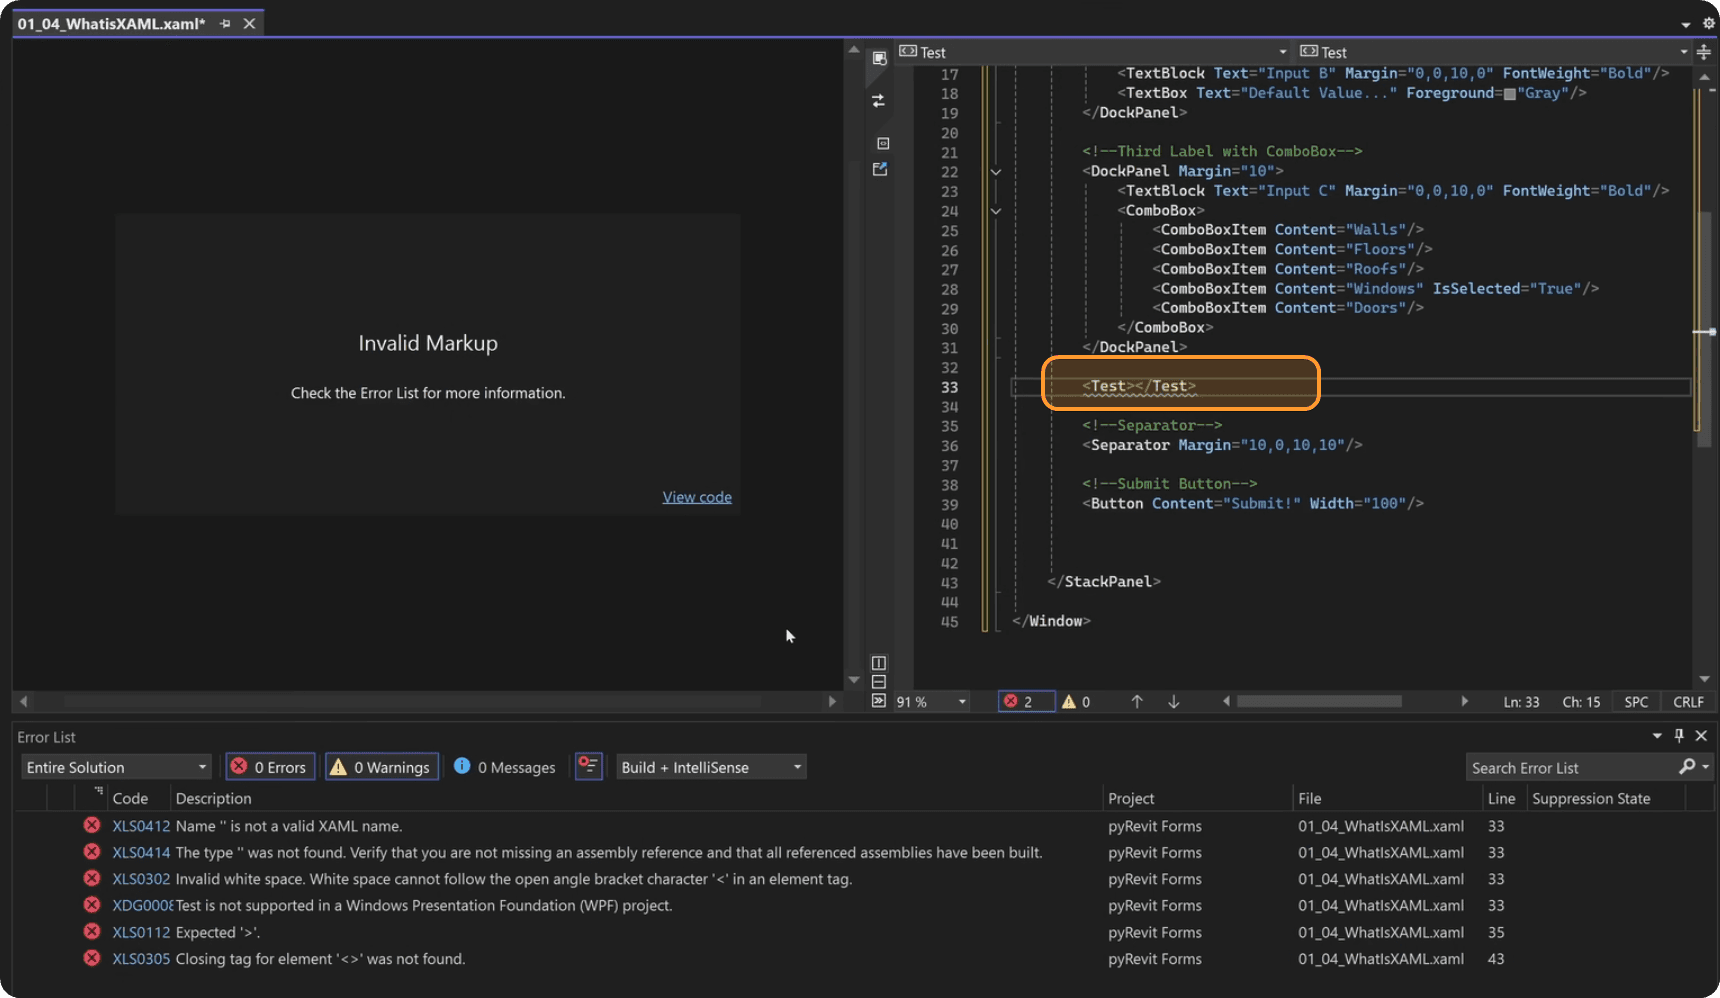
Next, let's create a random name for a new control like <TestElement>
And obviously, this won't work and give you multiple errors saying :
- It is not a valid XAML Name
- The type wasn't found…
and so on.
Secret Weapon
Also when you get errors in your XAML and you are not sure what's going on, you can also ask ChatGPT for help.
Just provide you XAML code, and often times you don't even need to tell what's the error and it will fix pretty well.
Chat GPT is really good with XAML and WPF so it can certainly help you a lot with debugging and even writing certain parts of your forms. So use it whenever you need help with WPF or XAML.
We will talk more about AI for WPF in the end of the course, but for this lesson you've seen how I've given my broken XAML and it easily has fixed the error. So use it!
What to do when get an error?
Remember, when you get an error:
Look at what line it happens.
Understand why it happens.
Try to solve it or go back before error has occured.
If you can't solve it, ask Chat GPT.
Also when you need help keep in mind that more context, error messages and code you provide - the easier it is to help you. This works both for AI assistants and the community. Just try to give us as much information as you think is necessary and it becomes much easier to help you.
Summary
Alright, and that's a wrap for this module and introduction to WPF for pyRevit users. Now we are going to get our hands dirty and create a really useful form for pyRevit and I will explain you everything you need to know step by step.
So you will learn
- How to create XAML Form
- How to connect XAML to pyRevit
- How to manipulate WPF form with Code
- And in general, how to get user input with custom form
I wish you happy coding and we will see each other soon.
