
Resources
Summary
Let's explore your new pyRevit extension.
You've created your own pyRevit extension, and now I want to go over it and explain to you the basics and all the free resources that you got with my starter kit.

There's really a lot of resources, and code samples and they will be very beneficial to any Revit API developer.
Let's dive straight into this and take a look.
Exploring Resources
I will start with Resources panel, and then we will have a look at the folder structure and how can you modify everything inside of your extension.
Here is how Resources.panel look, and let's look at them one by one.
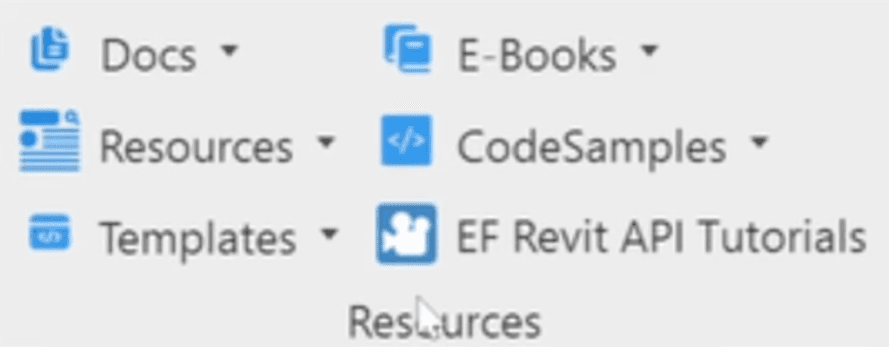
Resources - Docs
Firstly, I provided links to the docs you might need:
It's good to have links to these resources nearby as you will often have to open them up to reference something about Revit API or pyRevit.
Resources - E-Books
I've also included my E-Books that I've created about Revit API:
📘 E-Book: Beginner's Guide to Revit API
This 50 page E-books will provide you Revit API Roadmap + code samples and explanations of the Revit API basics.

📙 E-Book: aster Getting Elements in Revit API with FEC
Getting the right elements is half the solution. Learn how to use Revit API FEC and Filters to get your elements right.
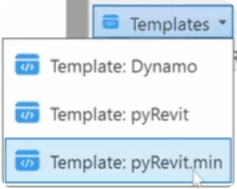
Resources - Templates
There are a few templates included in the StarterKit:
pyRevit Template
pyRevit Template.min
Dynamo Template
You will learn more about them in Lesson 1.05 and Lesson 1.09, so don't worry about them for now. I will explain you everything inside of them.
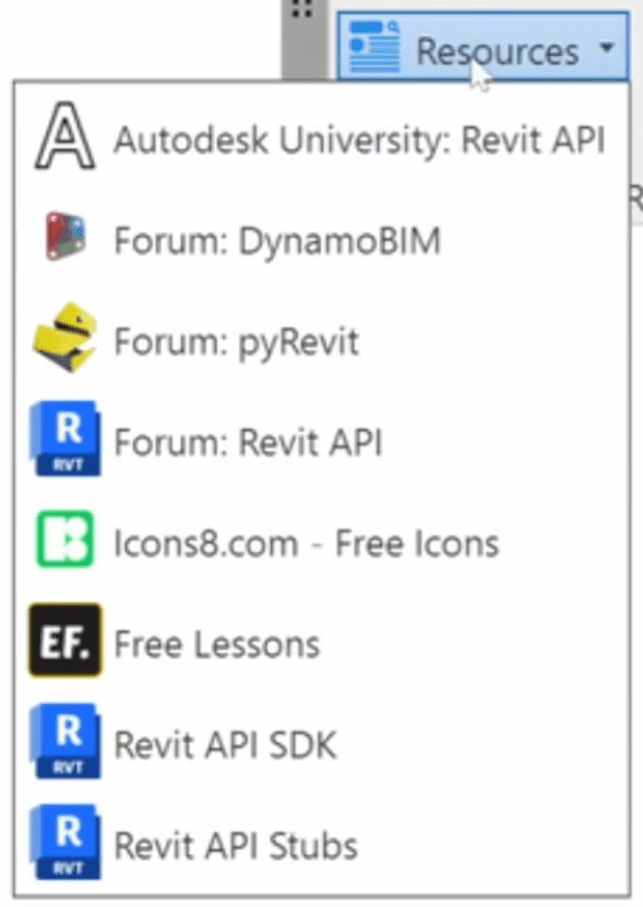
Resources
In the resources, you'll find different links to forums, SDK, Stubs, Icons, Free-Lessons and Autodesk University sessions for Revit API.
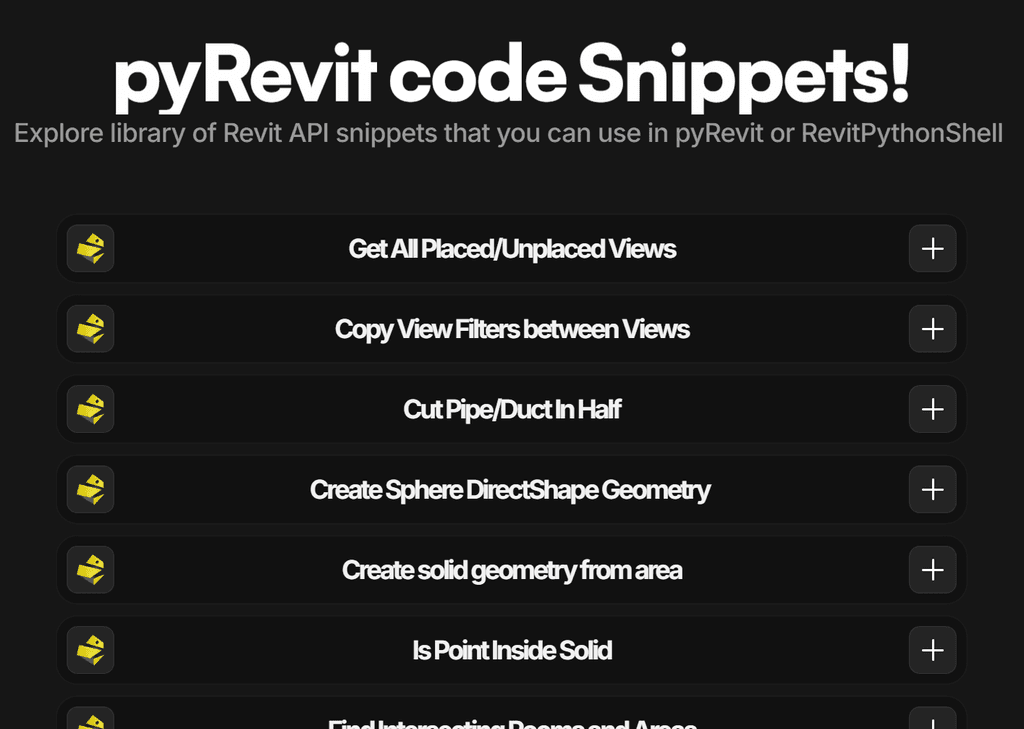
Resources - pyRevit Code Samples
Now let's talk about Code Samples in EF-pyRevit StarterKit.
In my opinion, this is where you will get the most value. I didn't want to just provide you an extension with a folder structure. I wanted to provide you the most used code snippets for pyRevit so you can reuse them in your own scripts and learn from these examples.
There is really a lot to unfold here.

Samples - GitHub
Firstly, you can search for "pyRevit" or "Revit API" on GitHub. You will find 240+ results for pyRevit alone, and there are thousands of working code snippets that you can explore, learn from and even copy to reuse in your own scripts. Why start from scratch?
💡 Pro Tip: you can replace github.com to github.dev when you have GitHub repository open to activate online version of VS Code IDE. This is much better for exploring code base inside of GitHub online.
Code Samples - LearnRevitAPI Snippets
Then You also can have a look at LearnRevitAPI Code Snippets, where I drop various code snippets from my tutorials, tools and when I help you with Revit API.
Code Samples - EF-pyRevit StarterKit
Finally let's look at the beefiest part of the StarterKit - Code Samples.
You will see that there are sample files for different Revit API topics:
Create Elements
FilteredElementCollector + Filters
Parameters
Selection
Transactions
Translate C#
Views and Sheets
WPF Samples Form
These snippets alone could have easily been a paid product, because they provide you code samples of the most basic concepts of Revit API that you need to understand and reuse it a lot of your scripts.
Code Samples - WPF Form
There is even a WPF sample form for pyRevit intermediate users included in the kit.
WPF (Windows Presentation Forms) is a modern framework for creating UI Forms and Applications.
It's mainly used with C# and therefore it's hard to find enough information on how to use it with IronPython.
But this base example will provide you everything you need to get started.
Creating custom Uis with WPF and pyRevit is the most requested topic on my channel. Therefore, I'm planning on creating a course on WPF for pyRevit that will be included inside this course.
It's not exactly a beginner-friendly topic, but I will do my best to explain it in the course so even beginners can create awesome looking forms.
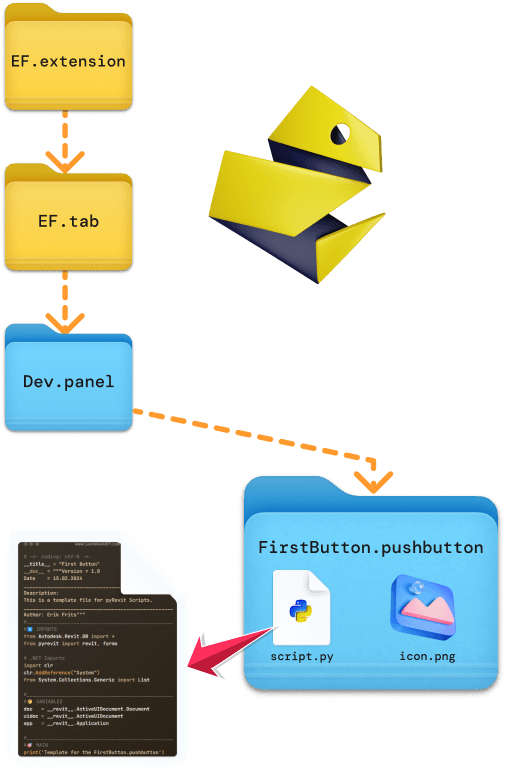
pyRevit Folder Structure placeholder
Lastly, you will also notice that this extension includes a lot of placeholder buttons and bundles (stacks, pulldown)
One of the greatest features of pyRevit is how simple it is to create your own extension.
You just need to create a special folder structure and pyRevit knows what to do next. And since you already have your extension, you can just explore what's going on inside the folder structure, and compare to what you see in Revit UI.

Here is the image that will explain everything you need to know about the folder structure.
Pay attention to special suffixes like .tab, which should stay the same. But you can write anything you want before them.
Every button in your extension is based on this folder structure.
💡And you can look inside by holding ALT and Clicking on any buttons in Revit UI. This will open the source folder of the button, which makes it easier to explorethe folder structure.
You modify everything inside your extension. If you want to create new buttons, simply copy one of the existing pushbuttons, rename it, and modify the script as needed. If you want to remove something, just delete corresponding folders.
And don’t forget to reload pyRevit to apply the changes in Revit UI.
In case the first image was a bit too much, here is the simplified version of the bare minimum pyRevit needs to create an extension with a single button.
You just need 4 folders and a script file, and pyRevit know what to do next. it can't be any simpler than this!
Lib and Hook Folders
You might also notice that StarterKit includes lib and hooks folders in the .extension.
These folders provide additional functionality and are not necessary. They are placed here as examples so you are aware that they exist, and later you will start using them when you are ready.

Lib is used for creating your own library of code snippets, which can be reused across all scripts. This is important to start reusing your code asap, and I will teach you more about it in the Lesson 1.07.
Hooks is used for creating EventTriggers. This allows you to monitor for certain changes in Revit project and add additional code to execute before or after the trigger.
For example, you can subscribe to Create In-Place Element, and not allow to use it and show a warning message explaining why it can't be used.
It's incredibly powerful, but it's not exactly for the beginner's. You should be careful and write efficient code to avoid creating more issues. I might cover it in the end of the course.
What's next?
We are getting closer to actually start coding with Revit API.
But first, we need to setup your development environment, and that's what we will do in the next lesson.
I will show you how to:
Download and Install necessary Revit Add-Ins
Install code editors (pyCharm and VS Code)
Setup Revit API Autocomplete
HomeWork
Before going to the next lesson, I want you to explore and clean up your extension:
Explore Folder Structure
Compare it to Revit UI
Remove what you don't need
Try creating a new Panel or a pushbutton
It's your extension now!
⌨️ Happy Coding!