
Resources
Summary
It's time to create your own Revit Extension.
You probably didn't expect it in the 2nd lesson, but by the end of this lesson, you will all create your own custom extension with PyRevit that will look like this:

💡Don't worry it's very simple to do because we will use my EF-pyRevit StarterKit.
This extension has a lot of buttons, resources, code samples and everything you need to get started.
But I will explain everything inside in the next lesson. For now let's focus on how can you create your own extension in under 2 minutes.
Installing PyRevit Extension
Before we begin, we need to install the PyRevit extension. It’s free and very simple to do. Download the latest release here:
https://github.com/pyrevitlabs/pyRevit/releases
Once you select the latest release, scroll down to Assets and download .exe installer. Once it's downloaded, follow the installer as usual.
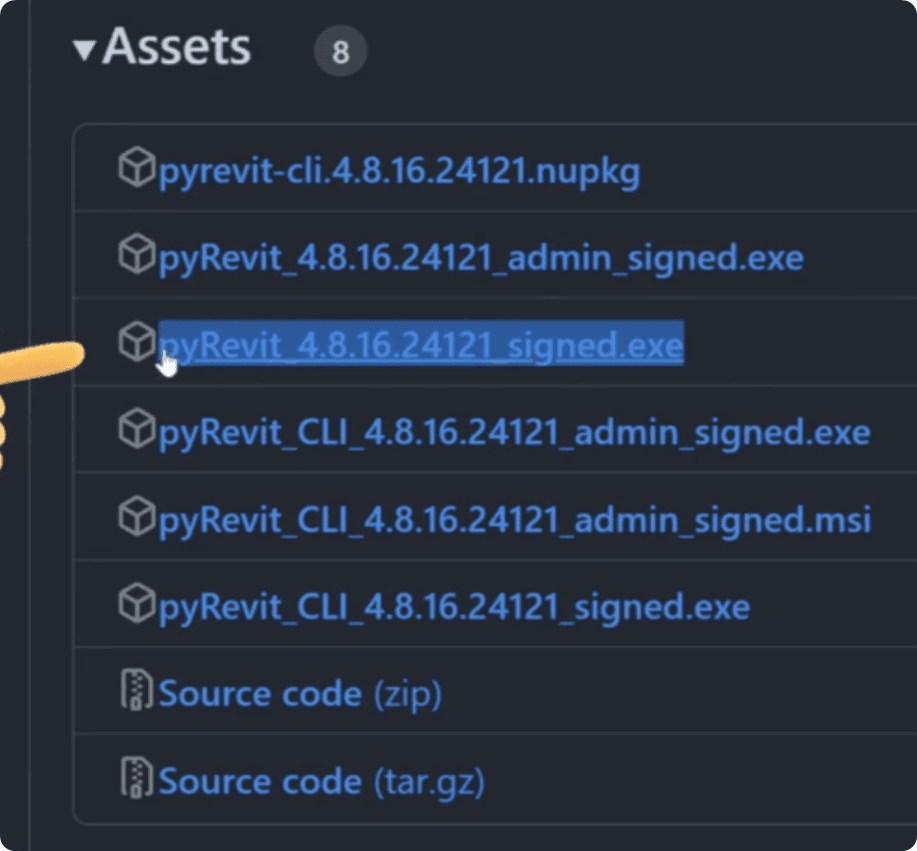
💡 Take a note of where you are installing your pyRevit. In 99% cases it's installed in the AppData. But sometimes it might be different and you should take a note of that.
❗pyRevit 2025 Compatibility
Also keep in mind that pyRevit 2025 support will be available with pyRevit 5.0+.
The development team has updated us recently that it's 90% complete, but they want to test it throughout before the official release.
If you want to test it earlier, you can check wip releases of pyRevit on GitHub. It's already available.
This update takes longer due to Revit migration from .NET 4.8 to .NET 8.0 .

You are almost ready to create your own extension. But first, you need to download my EF-pyRevit StarterKit.
This will provide you all the necessary resources, code samples and the folder structure for your own extension.
Create Your custom pyRevit extension in less than 2 minutes.
🔥Get pyRevit Starter Kit!
Get the best resource for pyRevit Beginners for FREE.
pyRevit StarterKit: Folder Structure
Once you download the StarterKit you will find .extension folder inside of it. This it the template for your extension. Unzip it somewhere safe on your computer.
Common Places:
C:\Users\USERNAME\Documents\my_pyRevit_Extensions
C:\Users\USERNAME\AppData\Roaming\my_pyRevit_Extensions
Or Choose any other folder!
Name Your Extension
Now you need to understand that to create a pyRevit extension you need to create a special folder structure and pyRevit knows what to do next.
And to make it simpler, I've already prepared the whole folder structure for you in the StarterKit.
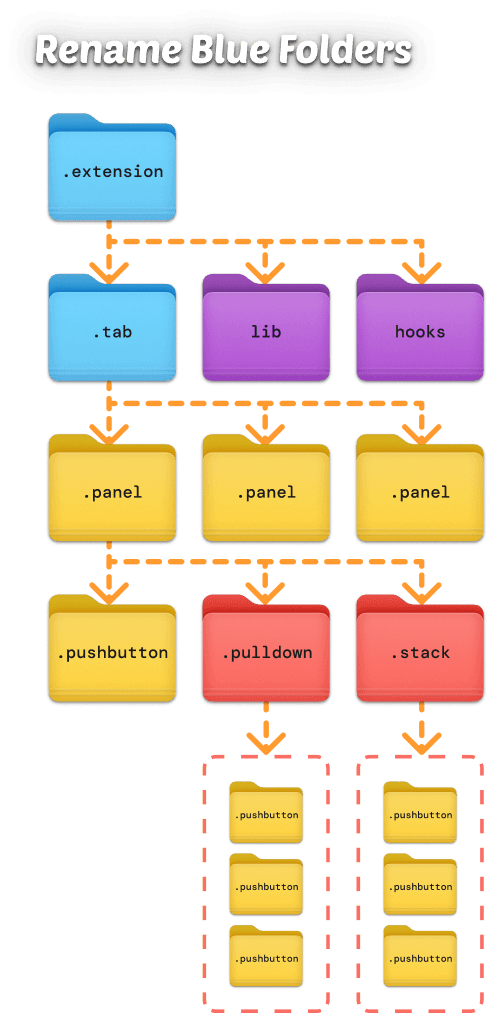
You just need to rename 2 folders, so extension is named exactly how you want it.
You will have to find .extension and .tab folders(blue) and put the name of your extension to see the same inside of Revit.
e.g.
📁LearnRevitAPI.extension
📁LearnRevitAPI.tab
Double check that they end with the same suffix as before. It's important for pyRevit engine.
Point pyRevit to the folder
By now your folder structure is complete.
You just need to go to pyRevit settings and point it to the path where it's located.
Go To:
Revit
pyRevitTab
pyRevit Pulldown Menu
Settings
Then, inside Settings, you need to point pyRevit to where your placed .extension
Click on Add Folder in Custom Extension Directories.
💡Make sure you don't select '.extension' in your path!
You need a path to where your .extension is located at.

Reload pyRevit
Lastly, reload pyRevit and you will become a pyRevit Developer with your own custom Revit toolbar.
🥳Congratulations!
You should see a new Tab in Revit with your own extension name.
And it should look like this👇
You will be able to customize every single aspect of your own extension.
I will show you how to do that in the upcoming lessons
Next Steps
We’re going to finish this lesson here, and I’ll explain everything inside the extension in the next lesson.
There are a lot of resources, placeholders, links to resources, and so on. You should really know more about it so you can get the most out of it.
HomeWork
Before you go, let us know in the community:
What did you name your extension?
What kind of tools are your going to create?
You might find a few Revit API buddies who are on the same path, and what if you could combine your efforts and help each other learn even faster?
For example here is how I would write:
👋 Hey everyone,
I'm going to call my extension - EF-Tools.
I worked in an architectural office, and I often struggled with Revit limitations.
So my EF-Tools will include all essential tools I wish Revit had by default and any discipline will be able to use them.
Also, I'm very excited to share all of them publicly, so people can learn from my tools and build on top of them.
Now it's your turn
⌨️ Happy Coding!