Resources
Lesson Objectives
Lesson Summary
Final Basic Concept
You've already learnt so much about Revit API!
You probably can not wait to finally start creating new awesome tools for Revit, but let's cover on more very important concept to get elements from your projects.
We will be working with FilteredElementCollector, this is a class that have many built-in filters to decide what kind of elements you want to get outside of your project.
It also might look complicated and scary to use, but it's actually one of the easiest one to use, because it's very repetitive. Have a look at the example:

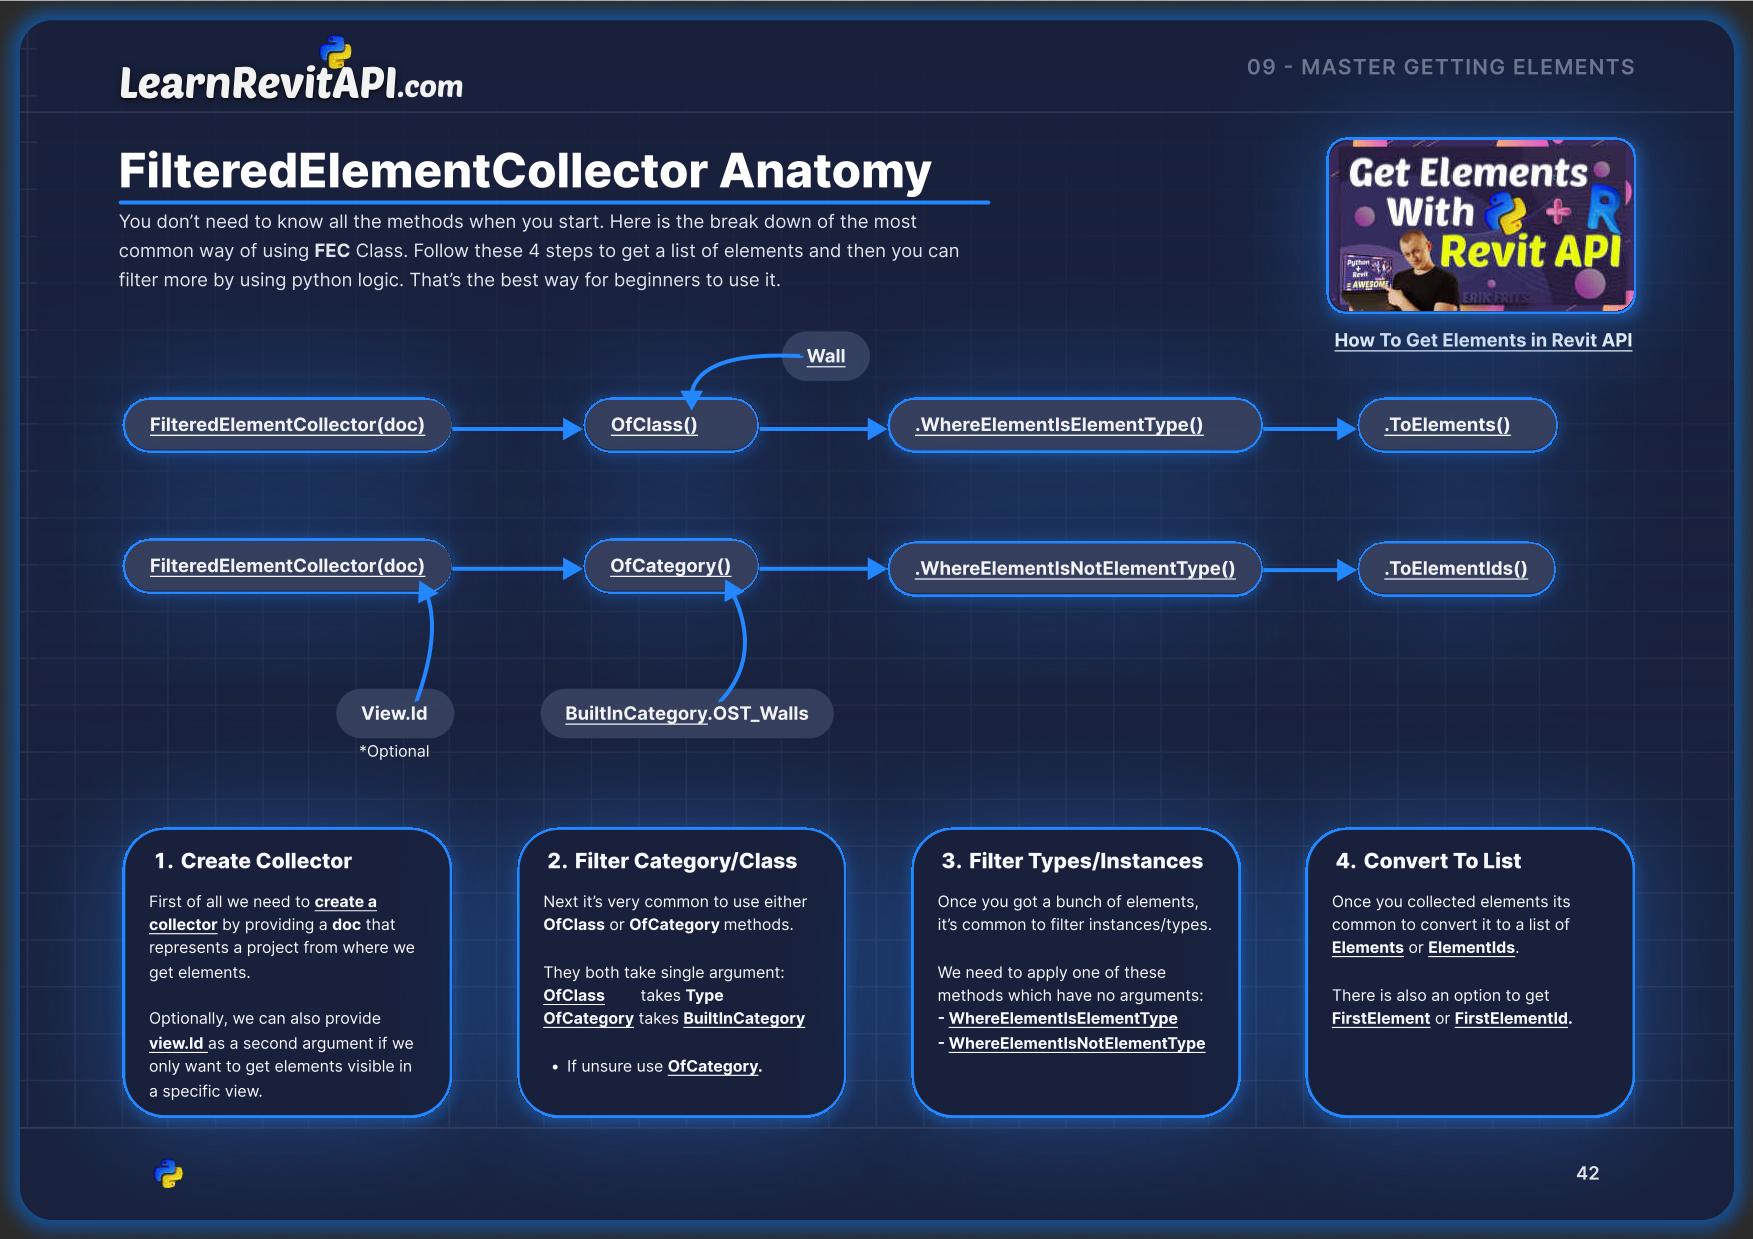
Wait, don't close the lesson. I know it looks long and hard to read. But we can break it down into 4 steps:
Create Collector - Create a collector for your proejct
Filter with OfCategory - Filter elements by Category
Filter with WhereElementIsElementType - Filter Instances or Types
ToElements - Convert collector to a list of elements
Don't worry, we will break it all down.
Filtered Element Collector Anatomy
Let's look into Filtered Element Collector anatomy.
📘I've prepare a few good pages to explain it in my free E-Book: Beginner's Guide to Revit API.
📙I also have another E-Book specifically about FilteredElementCollector and its Filters, where you can find a lot more examples. You can get it here.

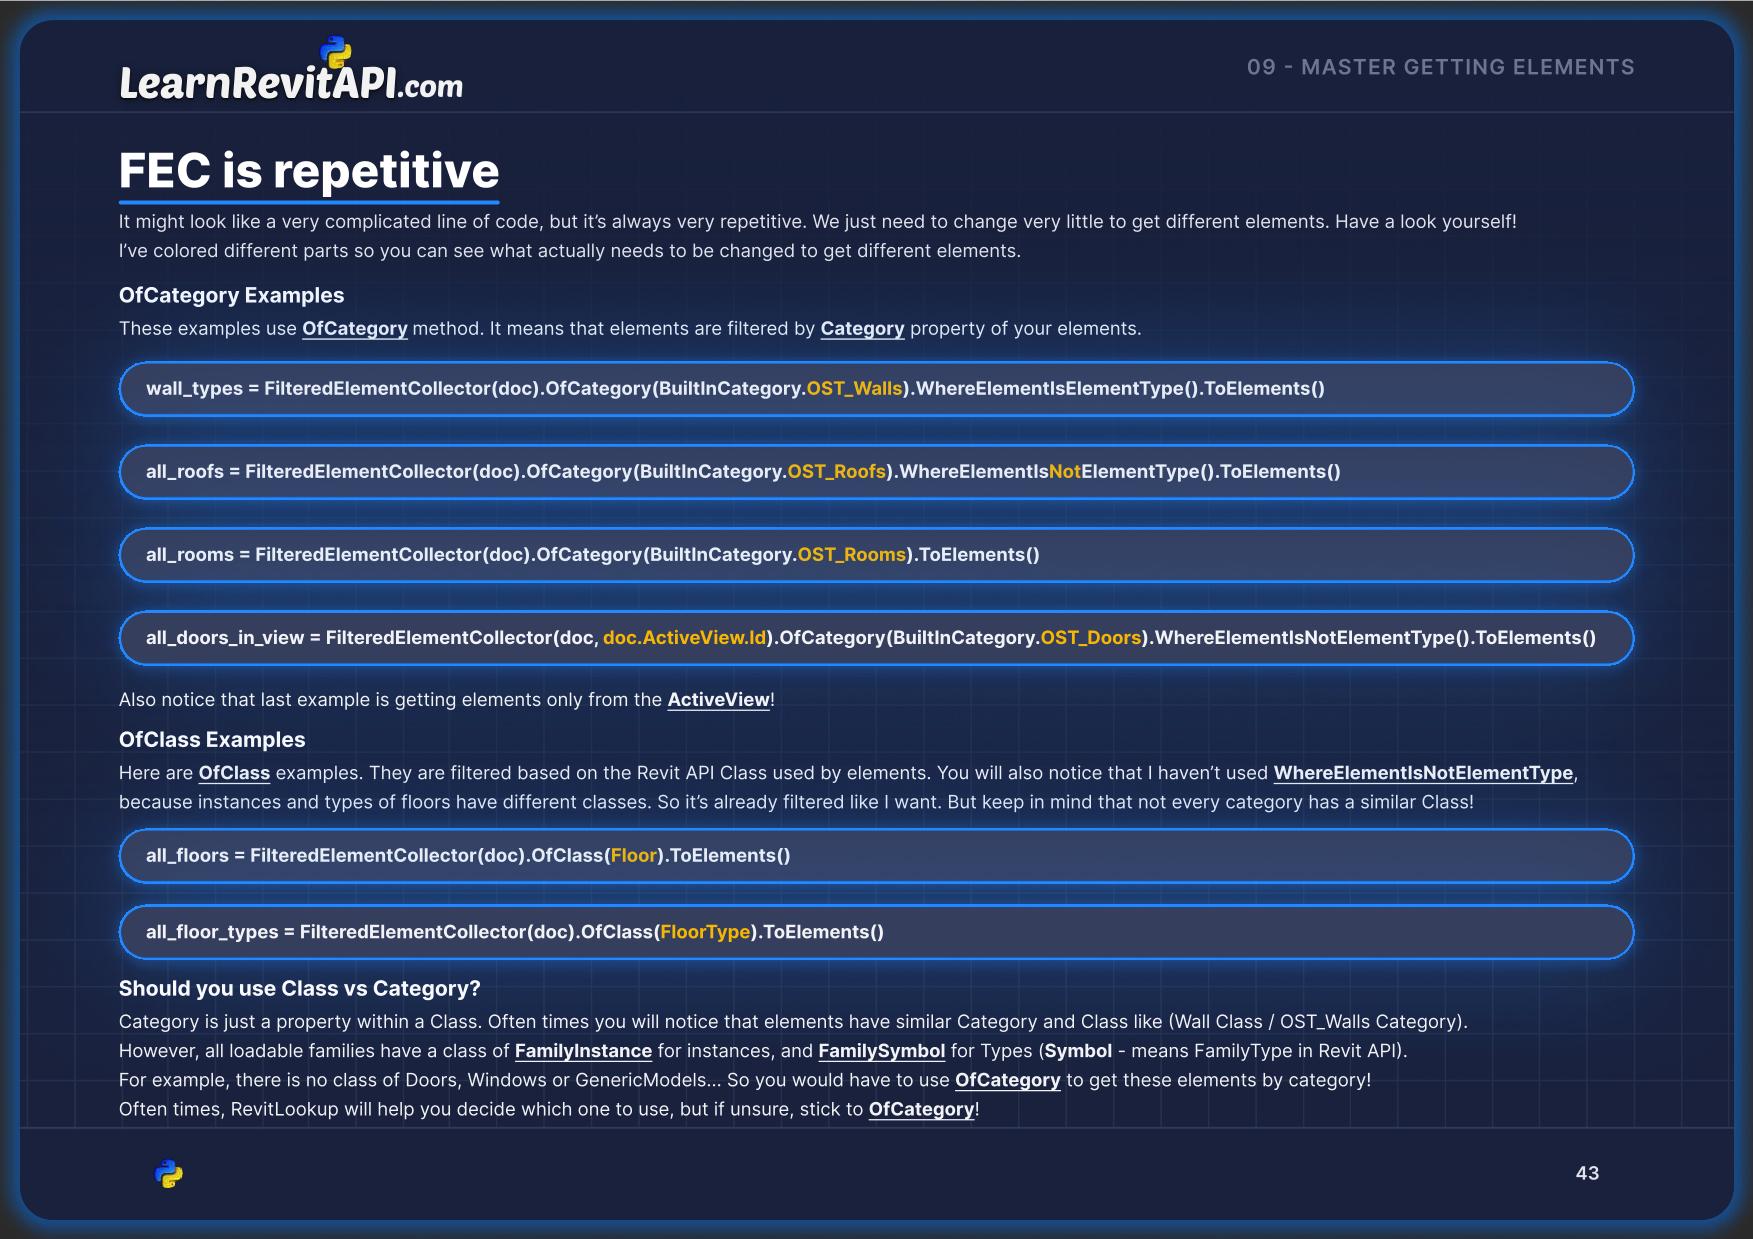
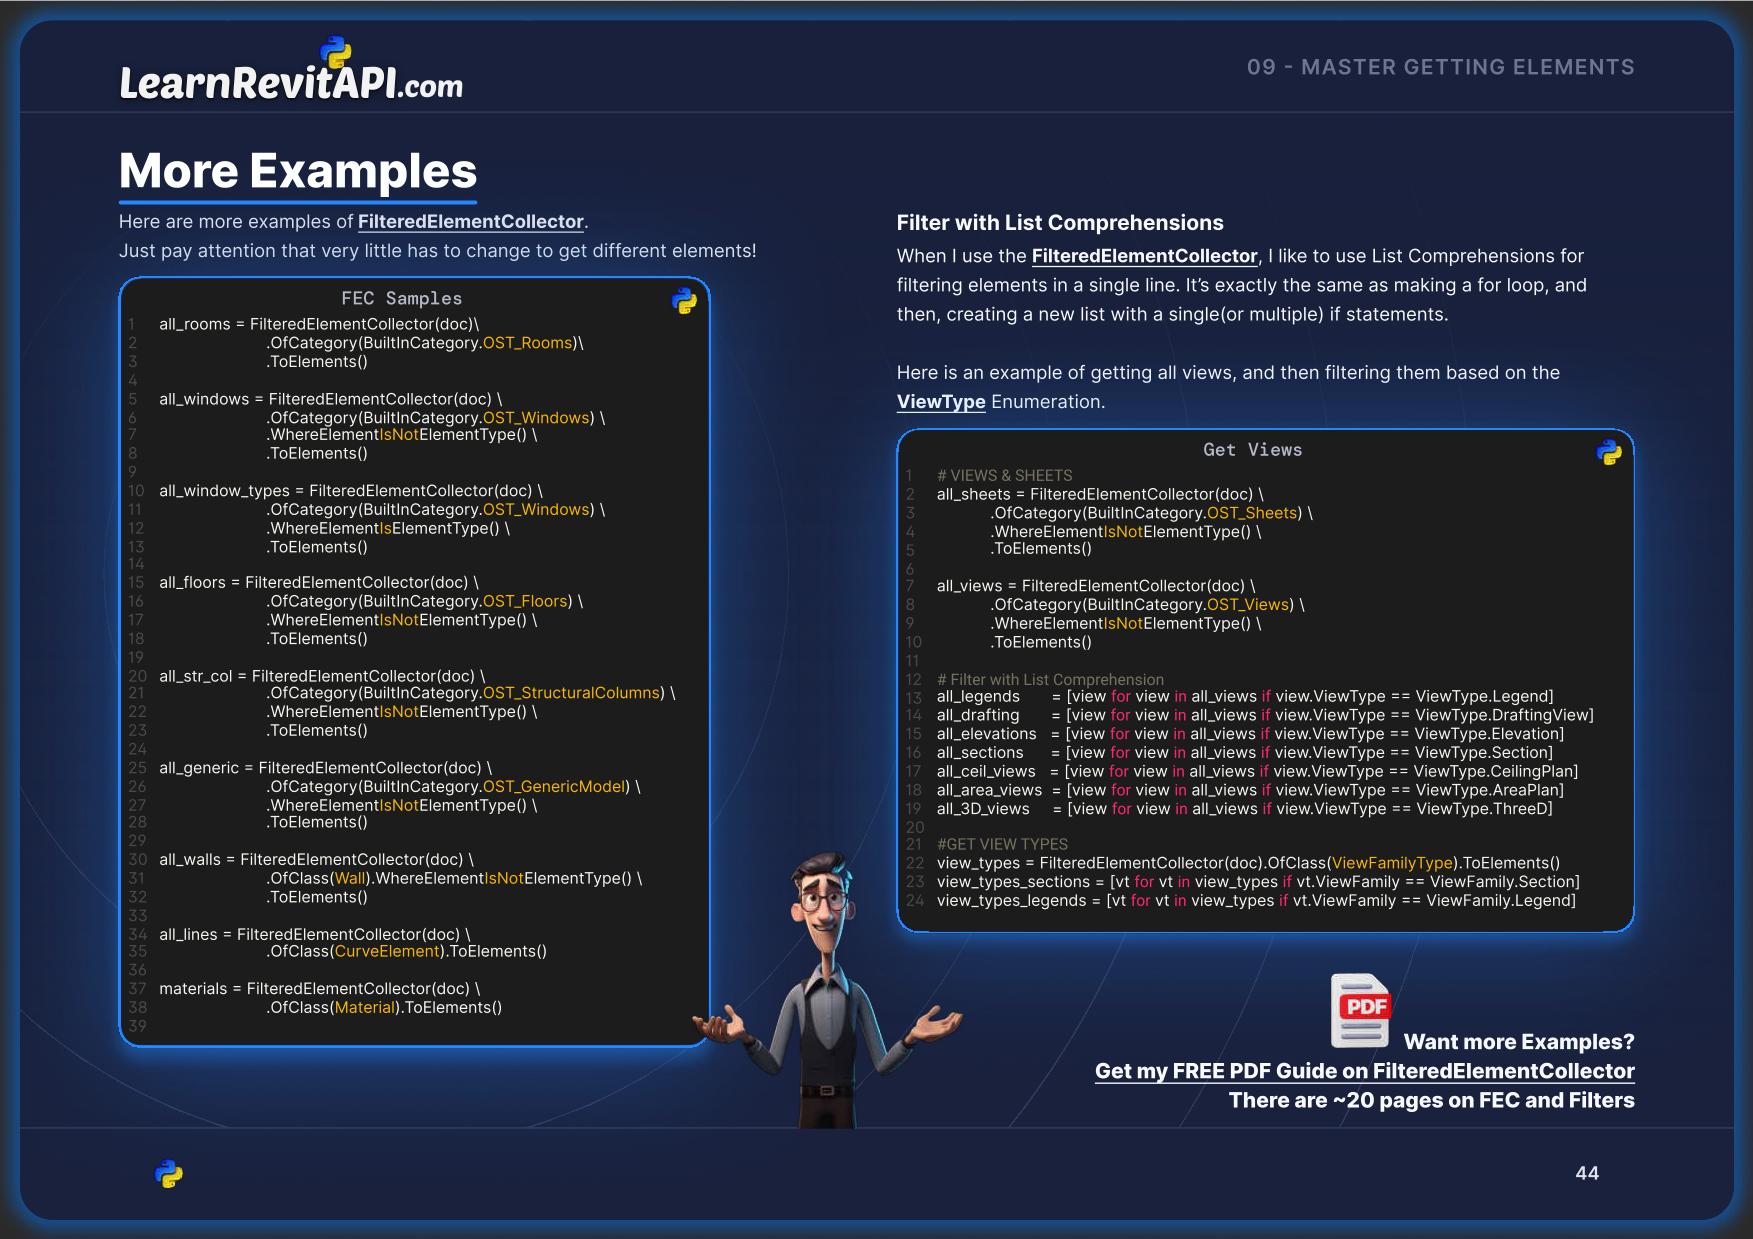
Code Examples
…
⚠️WORK IN PROGRESS:
Check in a few hours…⚠️
Homework
⌨️ Happy Coding!