Lesson Objectives
Download & Install pyRevit
Learn what is pyRevit.
Why pyRevit is so great?
Are you Ready?
Lesson Summary
Getting Started with pyRevit
Welcome to the first module of pyRevit Hacker Basics course.
This will be the most fun and most rewarding module as you will create your own Revit toolbar very soon.

Also, If you are reading this it means that you are already ahead of majority of people as you seek how to improve and be better while working in Revit and pyRevit is exactly what will give you an edge.
In this first lesson, I want to make sure you know what is pyRevit and how to install it, so let's dive into that so you can create your custom Toolbar in the next lesson.
What Is pyRevit?
pyRevit is an open-source add-in that gives Revit users a super power. It has a lot to offer:
A lot of Built-In Tools
A lot of Third Party Tools
Download pyRevit
To download pyRevit you can go to their official website www.pyrevitlabs.io and select one of the available versions.
Latest Release (4.8.16 when I wrote this)
WIP Installers (5.0+ Version)
💡Keep in mind that at the moment of writing, you need to use WIP version to use pyRevit in Revit 2025. In future you will be able to use the Latest Release if it has version 5.0+

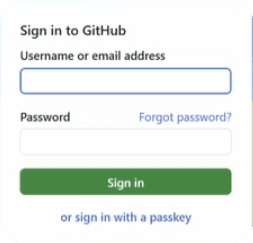
To download WIP version, you would need to sign-in to your GitHub account.
If you are new, it's very quick and easy to create a free GitHub account and you should definitely make one.
GitHub is the best platform for programmer to:
Backup their code
Access Git History
Collaborate with others
And share code with others
Once you download pyRevit you will notice that there are multiple installers. Majority of them are made for CLI (Command-Line-Interface), and you won't need that. Instead look for regular pyRevit installer.

Installing pyRevit
Install pyRevit like any other app or extension. During the installation, make a note of where your pyRevit is being installed.
In 99% of cases it will be installed in AppData/Roaming/pyRevit-Master. However, sometimes it gets installed in C Drive and you better know it.

Check inside Revit
Once you've installed pyRevit you can open your Revit and check if you can see a new tab called pyRevit.
It should look like this:

As you can see pyRevit comes with a lot of very useful tools. I highly recommend you to look around and see if you can find anything very useful to your work.
But that's not all! There are even more amazing tools available.
Additional pyRevit Extensions

pyRevit comes with a list of additional recommended extensions that you can install with a few clicks.
Click on pyRevit pulldown button and then select Extensions.
This should open you a list of additional extensions and there are a lot of great ones here, including my own EF-Tools extension.
You can select any and click on install to get access to even more cool tools.

pyRevit Biggest Super Power
I want to share the biggest secret about pyRevit. Everything is 100% Open-Source.
It means that you have access to every single line of code inside of pyRevit. So you can literally check how every single tool was created and even borrow some of that code.
And not only pyRevit tools, but all additional pyRevit Extensions like EF-Tools. So you get access to hundreds if not thosands of working scripts for pyRevit.
How does that sound? I hope mind-blowing🤯!

💡 I will show you how to access all that code in one of the next lessons, for now let's focus on pyRevit basics.
Summary
Alright, by now you should have pyRevit installed and shown in Revit.
Now we are ready for the most exciting lesson in the course - Creating Your Own Revit Toolbar. I can't wait to show you how to do that, so you can proudly call yourself pyRevit Hacker.
See you soon!
Homework
Make sure you follow along the lesson and install pyRevit.
It's not complicated and doesn't take long. And if you encounter any errors, let me know and I will try to help you with that.
⌨️ Happy Coding!
Questions
Error installing additional extensions.