Resources
Lesson Summary
Look inside Elements
Alright, so we know how to select elements with Revit API, what's next?
Next, we are going to look inside of them and try to read some data. And we will use an amazing free plugin for Revit - Revit Lookup.
Revit Lookup allows you to inspect your elements and look behind the curtain. You will be able to see all available properties, methods and most importantly the values they return. And then it will be easy to follow the same steps but with the code.
So let's get the plugin and then look inside.
Installing Revit Lookup
Let's install Revit Lookup.
Click here to open the GitHub page of Revit Lookup, and look for Releases button on the right side of the page.
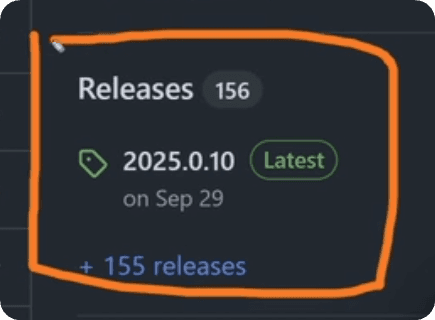
Then scroll down to Assets and choose the installer for you Revit Version. In my case I will choose Revit Lookup-2025.0.10-SingleUser.msi

Also, keep in mind that this plugin was developed Jeremy Tammik who is very well known in Revit API space(he has the biggest blog) and he worked for more than a decade for Autodesk. So, the plugin is legit and safe to use.
So, once you download it, run the installer and install as usual.

Once installation is complete you can run or restart Revit, and then you can find it under Add-ins tab.

Using Revit Lookup
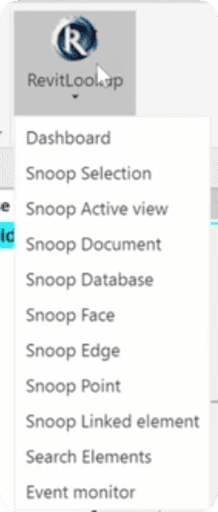
If you click on this plugin, you will notice there are a lot of options. But don't worry, you will only need 2-3 of them on regular basis.
Snoop Selection - Look inside elements selected in UI
Snoop Active View - Look inside currently open View
Snoop Database - Get a table of all elements in project
I think you would use Snoop Selection 90-95% times, and sometimes you would snoop view or database when you need to find something specific.
Now, let's look inside.
Select a few elements in Revit
Revit Lookup -> Snoop Selection
This should open a new menu with overview of your selected elemnets.
So once you snoop elements, you will see this table.
On the left you will have a list of selected elements, and you can decide what to snoop. And on the right you will see a list of all available properties and methods for the selected element.

💡Notice that on the left you have a pulldown menu of class names like FamilyInstance and Wall. These are the Revit API Classes of your selected elements. And then all elements will be listed under the classes with their internal names (Type Name in this case).
💡Also, you can notice that on the right you have 2 types of attributes. Some of them are regular black text, and others are bold orange.
⬛ Black Regular - Returns a simple property value (string, number, bool, ElementId…)
🟧 Orange Bold - Returns another elements or a list of elements that can be inspected further.
For example, you can get a Wall, then look inside of its WallType, then look at a list of WallType.Parameters and then read some parameter value. So you can open a new menu for new elements every time you click on bold orange text.
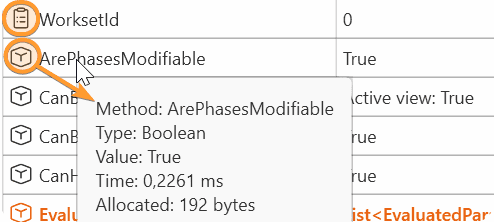
💡Also you can distinguish between Property and a Method in this window by looking at the icon in front of an attribute or by hovering over and reading the first word.
💡Tip: Keep in mind that all numeric values with units will always be in feet. So we will need to convert it if you want to work with metric values.(I show later)
Inheritance Classes
You will also notice that all properties and methods are sorted by the class where they come from. As you know classes can be built on top of each other and inherit the functionality of its parent classes.
For example Wall class is made from:
Element -> HostObject -> Wall
Each of these classes have a set of properties and methods that can be reused across multiple classes, and you will see them separated in the menu as well.
It's good to know, because if you would need some Wall specific property and method, you can scroll all the way down to Wall attributes and look there.
The inheritance concept is a key in OOP programming.

Revit Lookup vs Revit API Docs
By this point many start to question whether to use Revit Lookup or Revit API Docs. And my answer - you have it wrong. These is not one vs another situation.
These are both complimentary tools that provide you different insights into Revit API.
Revit Lookup is great for looking inside your elements an see actual values they return. It's best to quickly find where certain values are located and to look inside your elements and dive into the rabbit hole.
Revit API Docs is great for looking how to use specific properties and methods. It has more information about necessary arguments, examples remarks and various information necessary for working with Revit API.
For example here is GetTypeId Method in Docs and Revit Lookup. Very different results, one is more theoretical, the other is more practical.
So use them both in your work.


Look inside Elements with Python
Alright, enough of the theory, let's get to practice. Let's use what we've learnt from Revit Lookup and use it in our python script.
Firstly, let's pick an element and then we will look into properties and methods.
Here is a code snippet to PickObject in your Revit project.
Alright, so we have an element let's read some properties.
💡Tip: Properties and Revit Parameters are not the same.
Property is an attribute related to Revit API Class.
Parameter is like a data container assigned to a category or certain families.
We'll talk about parameters in the next lesson, focus on properties and methods.
To read Properties:
Take variable (e.g. element) and then write property name after a dot like this: element.PropertyName
To use Method:
Take variable (e.g. element) and then write method name with parenthesis after a dot. like this: element.GetTypeId() . Note that some methods will require you to provide arguments.
💡Tip: You will often get ElementIds, so you might want to convert them with doc.GetElement().
⚠️Exception: For some reason in pyRevit when we try to get .Name property from types, we get an error saying it's not available. I can't explain why it happens but I can provide you a workaround by using internal class method.
Explore Revit Lookup with nested elements
Alright, let's look deeper into our elements. Imagine we want to take a wall and then look into materials used inside this wall. Then we could report on that or do something depending on the materials.
Firstly, how would you do it manually?
💡Tip: When you try to automate anything, try to replicate all steps you do manually. It means you have to pay close attention to all simple steps you do, especially to those that you don't even notice anymore.
To find materials in a wall you would follow this sequence:
Wall -> WallType -> Structure -> Explore Layers
Explore with Revit Lookup
Next, before we go to code-editor, let's try to find the answer with Revit Lookup.
Pick a Wall
Snoop Selection
Look inside until you can find Material Layers
In this case you would follow the following steps in Revit Lookup:
Wall -> .GetTypeId() -> .GetCompoundStructure() -> .GetLayers()
And then you would iterate through layers and look at their .MaterialId property.
🎦I recommend to check the video at ~16:00 mark
Follow same steps in Python
Alright, now you have a clear roadmap on how to get values that you need. We just need to follow it with python step by step.
I recommend to keep Revit Lookup on the side and follow along both in Revit Lookup and your code. This helps beginner understand these steps.
Here is the code:
And here are the results:
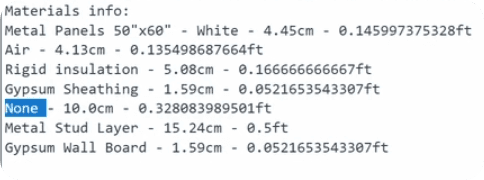
💡Tip: Revit API stores values in feet. So, you can use ConvertFromInternalUnits and ConvertToInternalUnits method. You just need to specify units with UnitTypeId.
💡Tip: In Revit API if you get ElementId(-1), it means that there is nothing assigned. Make sure to check, to avoid errors when you try to read values from a material that doesn't exist.
Homework
Alright, Guess What?
It's time for you to read properties and methods with python.
Firstly, follow along this lesson, but I would recommend you to take Floors instead of Walls. They will follow the same process, but it's always great to experiment and change a little. Don't be afraid to go outside your comfort zone.
Secondly, I want you to pick any other element, and try to read other properties. See how much information can you already get.
Here are a few ideas you could explore:
Take a door and check if it's mirrored or not.
Take a Furniture element and see in what room is it located?
Lastly, share your results in the community. Together you can learn see way more examples and learn from each other. Sharing is Caring!
⌨️ Happy Coding!