OOP Basics for Python
OOP is a very important concept in programming that is all about working with classes and write more efficient code. And it's very important that you understand the basics so you can get the most from working with Revit API Classes. Let's cover the basics.
Resources
Lesson Objectives
Learn about Object Oriented Programming (OOP)
What is Class and why we need them?
Basic Syntax of Classes, Properties and Methods
Understand self in classes
Create your own class
Are you Ready?
Lesson Summary
Intro
Alright, we are about to cover quite an advanced concept, so buckle up.
Some people get it very fast, while others (me included) need some time to process until it clicks. So don't worry, the goal here is to why and how we can use OOP in programming.
I will do my best to provide you many analogies so you understand it better.
Let's begin with OOP
Object Oriented Programming in Python (OOP)
OOP is a specific way to structure your code with custom classes. It allows you to bundle together variables and functions as a blueprint to create similar objects with the same functionality (more on that in a moment).
It's incredibly important concept on large code bases where you need to reuse your code in a very smart way. And while some programming languages require you to code only using OOP, python is very flexible and it's an optional feature. That's why python is more beginner-friendly and easier to start with.
However, it's incredibly beneficial for you to understand the logic behind OOP and classes, as it will help you to work with Revit API classes.
So let's begin with the basics.
What is a Class?
A class in Python is a blueprint for creating objects, defining their variables (properties) and behaviors (methods).
🍕Think of it like a recipe— the class is the recipe, and each object created from it - is a unique dish made following the same instructions.
Remember the lesson about functions?
Function is a reusable piece of code wrapped into a container with a name, so you can reuse that code by calling the name.
Well, classes are similar, but on the next level.
Classes allow you to combine multiple functions and variables as a single blueprint that can be used to create instances of that class.
And then all instances have access to the same functionality defined in the blueprint (class).
Think about the coffee maker for a second.

Imagine an EF-Coffee maker brand. There could be millions of these sold around the world.
All of them follow the same manufacturing process, and they have exactly the same functionality.
But, each one is unique. They can have different Ids, might store different data on number of uses, capacity of beans and water and so on..
So the blueprints of that coffee maker would be a Class. And each new coffee maker would be an instance of that class. And each instance have the functionality and stored data that was defined inside of a blueprint.
Let's continue with class analogies, and think about built-in types like strings.
String is like a built-in class, that can hold a piece of text data, and has certain functionality attached to modify it:
.upper(),.lower(),.format()and so on…
Well, not only we can also create our own classes with custom functionality.
We might use other classes from other libraries, like Revit API for example. It contains thousands of classes and each has certain functionality available.
And once you understand the concept of OOP, it will become so much easier to read Revit API Documentation.
But don't worry, you will have plenty of time to get comfortable with Revit API, even if you don't understand OOP.


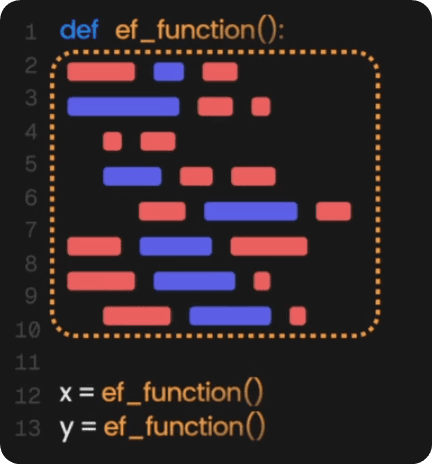
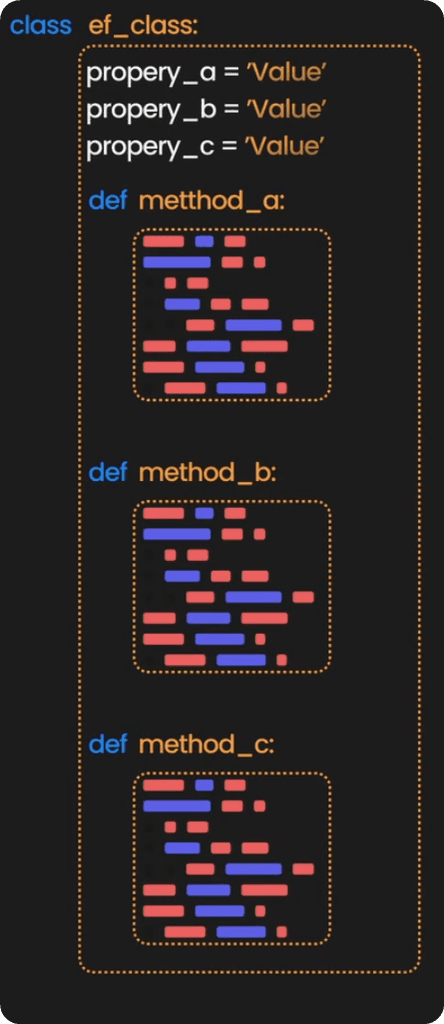
Basic Syntax - Classes
So, let's create a simple class example so you can understand it better.
To create a class we need to use special keyword - class and then define the name and end it with a colon :.
Now inside of a class you can define methods to describe its functionality. And to create methods, we just create functions inside of a class. And you have 2 options:
Name it anything and provide any code you want
Use pre-defined names that have certain meaning for you class.
For example, there is a special method named __init__, and it describes how instances of this class should be created. You can define if you need to provide any arguments to create it, and what should happen during creation.
Let's start very simple and create a simple __init__ method that takes one argument, and it will assign it to a property called wall_type and second property will hold value 250.
Here is code:
💡Notice that we use self as the first argument, and to create properties inside your class.
This is a special way to relate data to the class itself while you create your blueprint with a class. This allows you to relate to data inside of a class, which will be later used by your instances.
Now that we have created 2 wall instances from our class, we can also read the data inside of each instance. To read a property, we put a dot, and then the name of a property.
So here is how we could read wall_type properties from each instance.
So in this example we have:
Created a Class for EF_Wall
Used it to create 2 instances
And printed data these instances can hold
What is self?
self represents the instance of a class itself and it can be used to access its properties and methods both from inside or outside of a class.
Think of it like this:
When you define a blueprint for your class, you use self to assign data to the class itself. Then when you create instances based on this class, the self will relate to the instance itself. Like we created wall_a and wall_b , so now we can read wall_type property from both, and they can hold different values.
I will show you a great example of using self in the end when we create another method.
Create Methods
Alright, now let's add some extra functionality to our class by creating a method. As you remember, method is like a function, but inside of a class.
So, let's create one and then I will break it down.
Once again, you will notice that all your methods start with self parameter, this is just a Syntax rule in python.
Then you can also finally see the big benefit of create properties like self.is_flipped. You can see that this property was first defined inside of the first init method, and then you modified the value in another method by using not keyword (not creates opposite boolean).
And we can do all of that thanks to self reference.
And if you have a look at how it's used now, you will realize that we can create a lot of wall instances from our class, and each one will remember its own state of is_flipped. And we can modify it by using this method.

Print All Data with Method
Let's add another method, and this time I think the concept of self will make so much more sense.
Let's add another property height to our Class and then we will create a lot of wall instances with this class.
Now I want to go over all these walls I've created, and print all the data about them. So as you already know, we can read all property by placing a dot and then using the name of that property.
So we could make print statements like this:
Hold on a sec.
Once you start copy-pasting stuff like this, you are clearly doing something wrong…
So how about we create a method so we can always print the same information for any of these wall instances?
So here is how we could do that:
And now we can print the data from every single wall with so much ease. And if we need to make any changes, we only need to do that in one single place, instead of going through repeating code and hoping that we wouldn't miss anything.
But I really want you to compare the method and the manual printing and notice the key difference.
Do you see it?
I will give you a hint. Have a look at self vs wall_a part of the code.
This is where it usually clicks why we need to use self inside of classes. You use self inside of a class, because you are working on a blueprint for your instances. But once you have an instance, you don't relate to the blueprint anymore, no, you relate to an actual instance.
This way you can have hundreds of instances, and each can store its own data, as long as it follows the rules defined inside the class itself.
Conclusion
Alright and that's an introduction to OOP in python.
Remember, it's okay if you find it a bit overwhelming or even confusing. We all need some time to process and connect some dots with classes.
Personally, I didn't understand classes right away. I needed to take a break from programming and then a few days latter, out of the blue, it just clicked for me and I understood the main concept behind classes. So give it some time and maybe reinforce with more tutorials on OOP if you want to.
But the goal is not to get OOP experts and start coding only using classes now. No, that would be horrible decision. The goal is to understand the idea behind classes and how they are created, so when you start using Revit API classes you can understand the basics about properties and methods and how you can use them in your own code.
Homework
As I've mentioned in the beginning: This was a very brief introduction to a very big concept in programming.
But luckily, you don't need to master it now.
You just need to understand:
What is a Class?
What are Properties and Methods in classes?
How to Read/Use properties and methods?
How to create instances from a class?
What is
selfin a class?
And don't worry if you find it confusing. You will understand it more as you get better at programming. You will be fine even if you skip this whole lesson. But it will also be beneficial if you understand the logic and the idea behind classes.
So it's your call.
⌨️ Happy Coding!