rpw Forms

rpw module has a few usefull forms available for us, with the most versatile - FlexForm. So let's look into it.

rpw Forms

rpw module has a few usefull forms available for us, with the most versatile - FlexForm. So let's look into it.

Summary

rpw Forms

The main benefit of the rpw module, is that it's already included in pyRevit by default. This makes it very easy to use it.

This module offers a lot of different pre-written functions that you can start using, even for getting elements and performing certain functions.

However, right now we are focused on the Forms.

When you are going to scroll through all the forms, you will notice that there are a lot of similarities with pyRevit forms. Thus, it doesn't make much sense to use them when you can just use pyRevit's forms.

However, there is one form in particular that is incredibly powerful and yet - simple to use. And that's our beloved FlexForm.

FlexForm

We've already covered FlexForm previously, but let's review it once more.

Additionally, I will also mention a few new things, such as modifying the styling of your components and creating more buttons with custom functionality.

Below is an example code from the docs, and it will create a simple FlexForm. And as I've mentioned, it's very simple to use.

#⬇️ Imports
from rpw.ui.forms import (FlexForm, Label, ComboBox, TextBox, TextBox,
                          Separator, Button, CheckBox)

#📊 Create a list of Components
components = [Label('Pick Style:'),
              ComboBox('combobox1', {'Opt 1': 10.0, 'Opt 2': 20.0}),
              Label('Enter Name:'),
              TextBox('textbox1', Text="Default Value"),
              CheckBox('checkbox1', 'Check this'),
              Separator(),
              Button('Select')]

#✅ Create FlexForm
form = FlexForm('Title', components)
form.show()

# 👀 Preview Results
print(form.values)

Add more Components

The best part about this form is that it's not limited to just a few inputs.

You can decide yourself how many inputs you need and simply create a list of components for them.

This will stack them on top of each other and display the form to the user. A huge shout-out to Gui for creating such a simple and yet powerful UI form!

Below is an example if I were to copy components multiple times:

#⬇️ Imports
from rpw.ui.forms import (FlexForm, Label, ComboBox, TextBox, TextBox,
                          Separator, Button, CheckBox)

#📊 Create a list of Components
components = [Label('Pick Style:'),
              ComboBox('combobox1', {'Opt 1': 10.0, 'Opt 2': 20.0}),
              Label('Enter Name:'),
              TextBox('textbox1', Text="Default Value"),
              CheckBox('checkbox1', 'Check this'),
              Separator(),
              Label('Pick Style:'),
              ComboBox('combobox2', {'Opt 1': 10.0, 'Opt 2': 20.0}),
              Label('Enter Name:'),
              TextBox('textbox2', Text="Default Value"),
              CheckBox('checkbox2', 'Check this'),
              Separator(),
              Label('Pick Style:'),
              ComboBox('combobox3', {'Opt 1': 10.0, 'Opt 2': 20.0}),
              Label('Enter Name:'),
              TextBox('textbox3', Text="Default Value"),
              CheckBox('checkbox3', 'Check this'),
              Separator(),
              Button('Select')]

#✅ Create FlexForm
form = FlexForm('Title', components)
form.show()

# 👀 Preview Results
print(form.values)

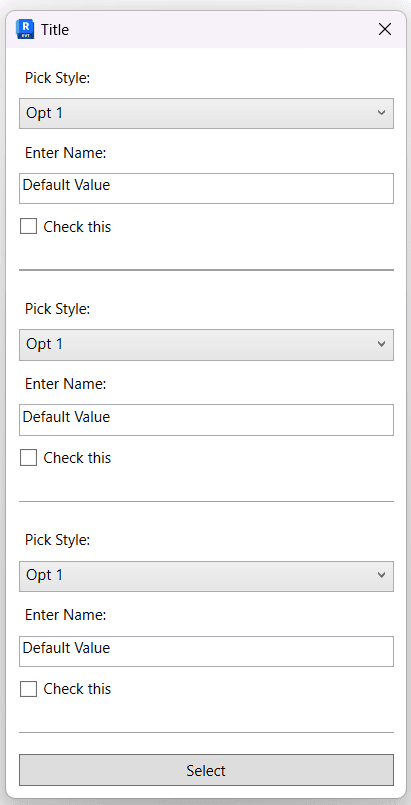
💡 Make sure you assign unique key names for your components!

Customize Components (wpf_params)

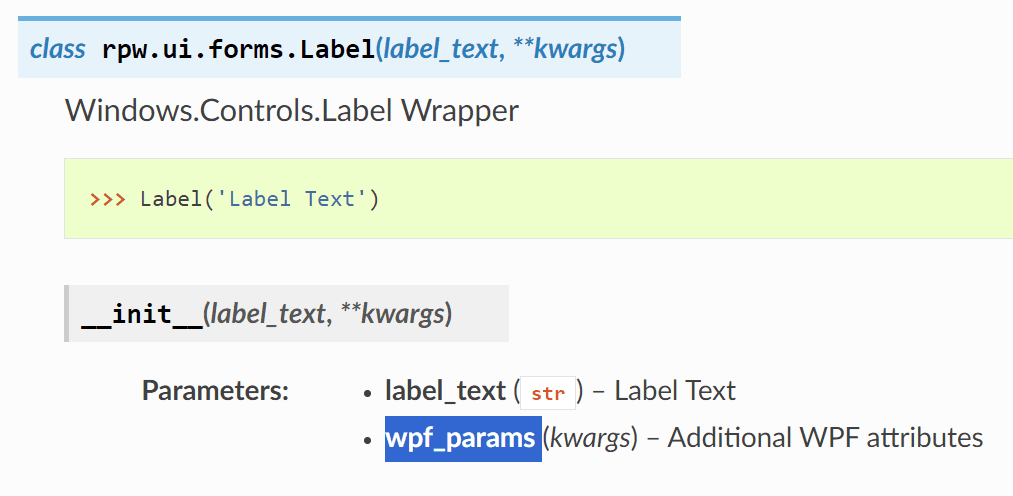
Now, let's look at components in the rpw docs. You will notice that they all have a wpf_params argument, which is **kwargs.

**kwargs is a special syntax in Python functions that allows for passing any number of keyword arguments. These arguments are then accessible as a dictionary within the function. This dictionary will be used to override properties of the components, because they are WPF Classes. WPF is Windows Presentation Forms - Advanced UI framework

If you are new to WPF, you don't need to dive deeply into its docs (e.g. Label Docs). I would recommend using Chat GPT instead, as it will be able to point out to you what's possible to do and even explain it. But keep in mind it can easily get confused.

Let's say that I want to change 2 properties of my Label:

  • FontSize

  • Height

Here is how I would do that. I simply create a Label as usual, and then I use these properties as the parameter name and provide the value that I need.

💡 Keep in mind that if you want to override a lot of properties, you might have to deal with more .NET classes, as you would need them for arguments. e.g. You would need to work with Brush class to override colors in WPF.

However, in my case, I just need to provide numbers.

label = Label('Pick Style:', FontSize = 40, Height = 60)

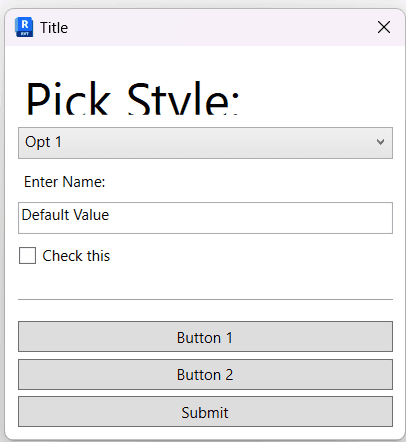
This label should be part of the components list. Here is how it actually would look:

from rpw.ui.forms import (FlexForm, Label, ComboBox, TextBox, TextBox,
                          Separator, Button, CheckBox)


components = [Label('Pick Style:', FontSize = 40, Height = 50),
              ComboBox('combobox1', {'Opt 1': 10.0, 'Opt 2': 20.0}),
              Label('Enter Name:'),
              TextBox('textbox1', Text="Default Value"),
              CheckBox('checkbox1', 'Check this'),
              Separator(),              
              Button('Submit')]
form = FlexForm('Title', components)
form.show()
# User selects `Opt 1`, types 'Wood' in TextBox, and select Checkbox
results = form.values
print(results)

And here is the result:


P.S.

I've given not enough Height, so you can increase it so the whole label is visible!

Custom Button Actions

Now, let's take a look at the buttons.

By now, you've seen that we can create a simple button with text, and it will act as a submit button for the form. But, we also have the option to assign special functions to these buttons by using the on_click argument.

It's fairly simple to use.

There are a few things to keep in mind:

Function Arguments: Whenever you subscribe to an event, you'll need to have 2 arguments in a function: (sender, event_args).

  • Sender - Refers to the button object itself.

  • EventArgs - Refers to the event that was triggered (click in our case).

Make sure you don't use parentheses when you assign a function to the on_click argument!

⌨️ Below is an example code snippet:

from rpw.ui.forms import (FlexForm, Label, ComboBox, TextBox, TextBox,
                          Separator, Button, CheckBox)


def action_a(sender, event):
    print('Action A is being executed...')

def action_b(sender, event):
    print('Action B is being executed...')


components = [Label('Pick Style:', FontSize = 40, Height = 50),
              ComboBox('combobox1', {'Opt 1': 10.0, 'Opt 2': 20.0}),
              Label('Enter Name:'),
              TextBox('textbox1', Text="Default Value"),
              CheckBox('checkbox1', 'Check this'),
              Separator(),
              Button('Button 1', on_click=action_a),
              Button('Button 2', on_click=action_b),

              Button('Submit')]
form = FlexForm('Title', components)
form.show()
# User selects `Opt 1`, types 'Wood' in TextBox, and select Checkbox
results = form.values
print(results)

HomeWork

Practice using FlexForms. They are really great for creating very customizable UI in a split seconds.

Just create list of components you need and experiment with styling and custom buttons when you want to get a little bit more out of it.

😉 Bonus point for sharing your forms with the community. Let's see how far you can push FlexForms.

⌨️ Happy Coding!

Discuss the lesson:

P.S. Sometimes this chat might experience connection issues.
Please be patient or join via Discord app so you can get the most out of this community and get access to even more chats.

P.S. Sometimes this chat might experience connection issues.
Please be patient or join via Discord app so you can get the most out of this community and get access to even more chats.

© 2023-2024 EF Learn Revit API

© 2023-2024 EF Learn Revit API

© 2023-2024 EF Learn Revit API