
Resources
Summary
pyRevit Inputs
Let's start exploring UI forms in pyRevit itself. We will start by looking at Effective Inputs in pyRevit Dev Docs, because it has plenty of code examples and screenshots of how these forms look. But most importantly, they are all very beginner-friendly.
Reference Source/Doc Strings
Before we begin looking at all the forms, I want to remind you that you can reference doc strings or the source code itself in pyCharm of all pyRevit modules, as long as they are referenced in your pyCharm environment.
⌨️ CTRL + B - Open source code where object was defined
⌨️ CTRL + Q (x2) - Read the Doc String of any selected object
💡 Make sure pyRevit library is referenced
💡 Make sure you import the module in your code
Now let's begin exploring all the forms in pyRevit Dev Docs/Effective Inputs
Alerts
Alerts are a great way to notify users and also ask for a simple input such as Yes/No, or even provide your own options to choose from.
Alert form is very versatile as it can change a lot depending on the arguments you provide. Personally, I mainly use it as a notification pop-up that cancels the script execution with exitscript=True.
But It's also great for getting simple user input.
Alert - Yes/No
You can set a True/False boolean to arguments like ok/ yes/ no to enable these buttons. Then the form will return you the boolean result based on what has user clicked on.

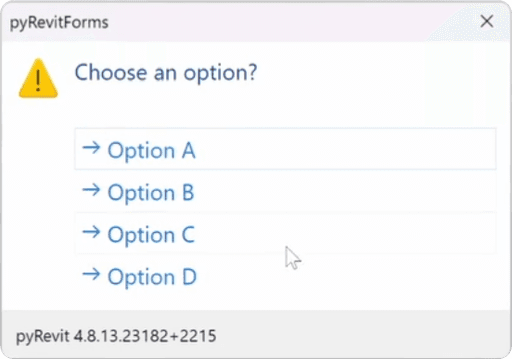
Alert - Options
This is a great way to give user multiple options, as long as you have no more than 4. You need to provide a list of string to options, and this is exactly what will be returned.
Later you can use if statements to see what option was selected.
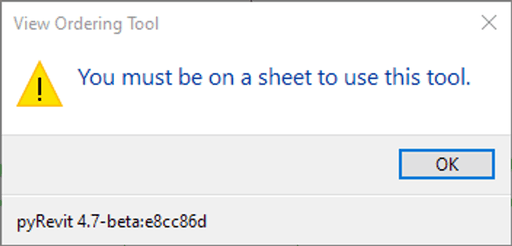
Alert - Exitscript
This is the most used form for me. I often use it to create notifications together with cancelling the script when something goes wrong. This way users are aware why I stop execution and maybe what they need to do.
Toast
Toast is a unique pop-up in windows that will be shown above all applications. This makes it perfect as a notification tool that certain script has finished execution.
On top of that it provides you an ability to embed certain links.

Command Options
You can create a menu with multiple options to choose from. If you have 4 or less options, I would still recommend you to use alert with options. They are more practical.
However, if you have more than 4 options, or you want to have a search bar or even switches, then you can look at command options. They are a great way to give user multiple options to choose from.

Command Options with Switches
Switches allow you to select certain options and then check if it's selected as True or False. Can be useful for tweaking some settings in a script
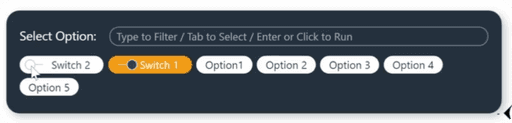
💡 Keep in mind that if user misses the button and clicks on the menu itself, it will close and won't return anything. I find it very annoying as it disrupts the workflow. But maybe you find it less annoying.
pyRevit Example:
pyRevit has a good example of using command options. You can find it in pyRevit -> Spy-> List Elements.
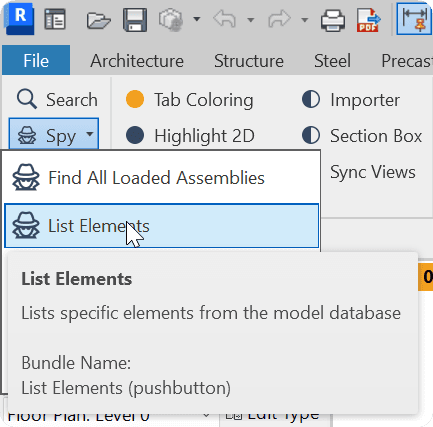
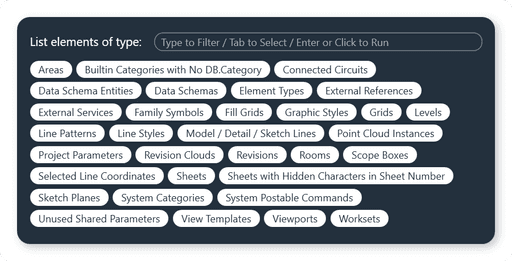
When you click you will be prompted a command option menu to choose what you want to list.
You can start typing if you want to filter whatever you are looking for or select anything as it is.
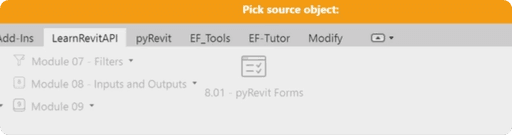
Warning Bar
Warning bar will create an orange bar on the top of Revit. I love to use it when I prompt user to select anything, because it makes it very clear that user is required to do something. But you can also use it for other purposes too.
Pick Path
Once in a while, you might need to ask user to select an excel or csv file or even provide you a path where you could save some reports.

Select Elements
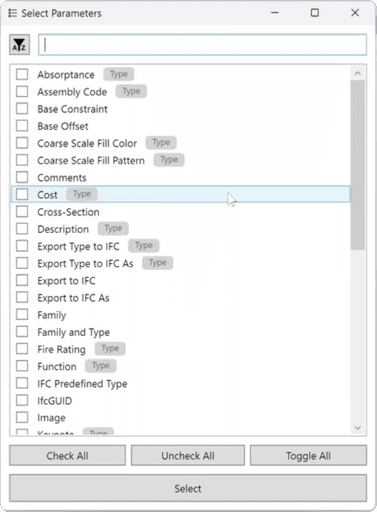
pyRevit has also a bunch of functions prepared for quickly selecting certain elements, such as Views, Sheets, Revisions, Titleblocks, Parameters…
It's a great way to get user input with a single line of code!
SelectFromList
However, often times you would want user to select something else. And therefore, you can use SelectFromList.
You can either provide a list of strings to choose from, or you can provide elements themselves, and specify a property in name_attr to display values in the list.
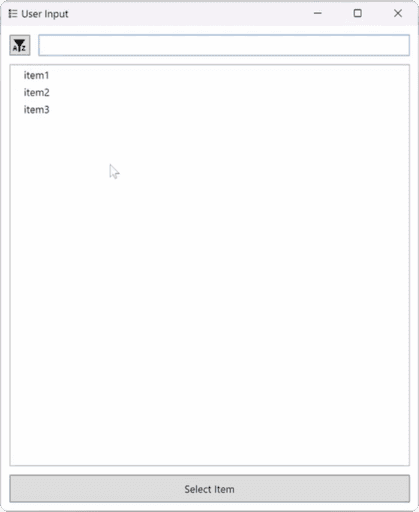
Select From List
This is a simple example of selecting one of strings.
Select From List - Elements with .Name
But since we often work with actual elements in Revit API, we can provide them too and specify what property should be used for its name in the list with name_attr.
💡 Keep in mind that if you provide a property name that can't be read it will give you an error. So make sure that you specify readable property name here.

Select From List - Dict of Items
Personally, I like to use dictionaries. This way you specify all the names as keys, and you can always retrieve the element itself by getting its value with a key. And you get both after the form
1. Selected Name
2. Selected Element

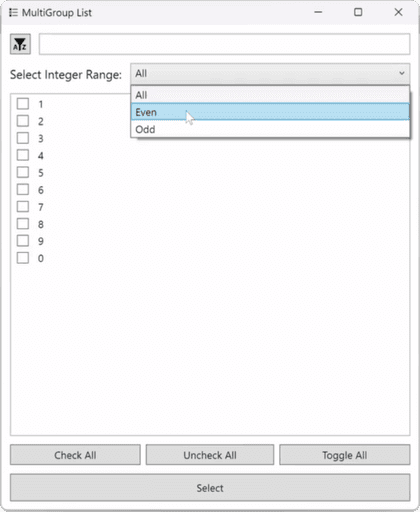
Select From List - Dictionary Groupping
Select from list also has an option to create data sets to group your data if necessary. You would provide a dictionary as the argument, and it will create sets for each keys.
Ask Input
Sometimes you might want to ask user a simple text input and you can use the following functions available in pyrevit.forms.
Ask For String:
Simple menu to ask for a string input.

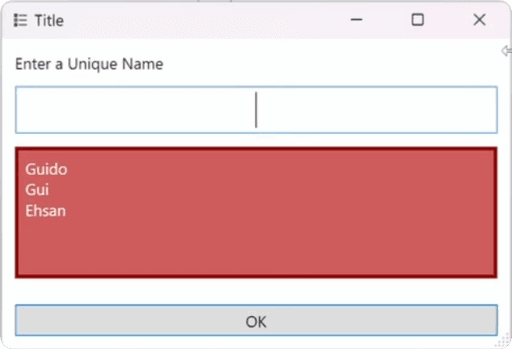
Ask For Unique String:
You can also provide reserved values for the user.
Ask For Date:
In case you need to pick a date, there is a date picker in pyRevit forms as well.

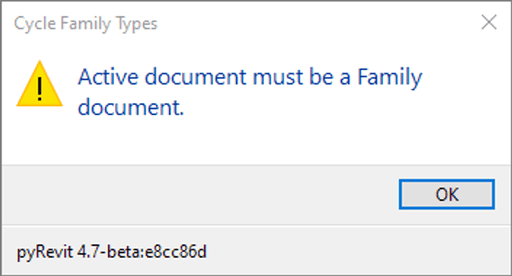
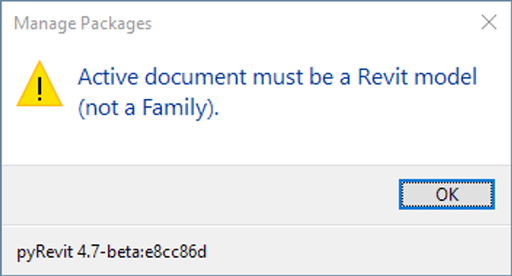
Check Conditions
We can also check for conditions. It might be useful if your script is made specifically for workshared model or you need user to select something before the script execution. These quick checks can help you check those conditions.
They quite self explanatory and all can be used with a single line of code:


Summary
Overall pyRevit.forms is one of the best ways to get user inputs for beginners.
They might not be the most customizable option. However, you just need 1-2 lines of code and you already get a very good user interface. I would certainly recommend you to use them in your scripts.
Even if you know how to create custom UI forms, it still makes sense to use pyRevit.forms in the prototyping phase, so you can focus on the backend logic of the script first. And then you can replace it with you own custom UI, if necessary.
HomeWork
Have a look at your previous scripts that you made already, and think if you can add UI forms to make it even better.
Or just select a few forms from this lesson that you might need, and give it a try. Just experiment so you get a bit more comfortable using them when you need.
After all, most of these forms can be copy-pasted with very little changes. So you should certainly use it.
⌨️ Happy Coding!